Showing posts with label bacon. Show all posts

Friday, May 22, 2026

Easy Chicken Bacon Pasta


This Chicken Bacon Pasta is so easy - and so delicious - you can pick up a couple ingredients on the way home from work and have it ready within a half hour! Or so, depends on your motivation level - ours took closer to an hour because we took our sweet time before enjoying this smokey, cheesy, yummy dinner. 

What makes this Chicken Bacon Pasta easy? Store-bought rotissery chicken! Most grocery stores have these easy-to-grab, cooked-and-warm chickens in little bags ready to go. I usually glance at thedate and time stamp on the label, this one I picked up from Whole Foods for $7.99 had just been put out less than an hour before. And they certainly have the rotissery process down pat, these things are so convenient when you don't have time to roast a chicken yourself.

 Along with a rotissery chicken, we picked up:

  • 1 pack bacon
  • 1 white onion
  • Garlic
  • Parmigiano Reggiano

Along with stuff we already had at home:

  • half-n-half
  • white wine (optional)
  • salt, crushed red pepper
  • thin spaghetti
  • olive oil

Super easy, we quickly preheated a stainless steel sacier pan over medium heat and - using kitchen scissors - cut 7 pieces of bacon into the hot pan. As those cooked off (with a helper stirring occasionally) we prepped the other ingredients. We quartered and then diced the onion by whirring it in our little veggie chopper. 

Along with the onion we grated about 1 cup of the parmigian and squeezed 2 garlic cloves through the garlic press. We "shredded" half of the chicken which is really easy with a store bought rotissery chicken - you can really just pull it apart and then use a knife to cut it into bite-size pieces. We used one thigh/drum and half of the breast. The other half of the chicken will be chicken salad tomorrow! We also added a second pot half full of water to the stove and got that up to boiling temperate for the spaghetti.


When the bacon was done we removed it carefully from the grease to a paper towel-lined plate and used another paper towel and tongs to remove the grease from the page, leaving some bacon "residue" behind. Then, we added 1 tbsp of olive oil and started sauteeing the onions over the same medium heat. We added a pinch of salt and a few shakes of crushed red pepper.


After about 5 minutes, we started boiling the pasta (we used about a 1-inch handful) which will go for about 7 minutes, starting our final countdown. Another minute and the onions are soft and translucent so we added the crushed garlic and stirred that in for a minute. Then, we added 1/2 cup of white wine (optional see below) to the pan and turned the heat up to medium high and really scraped the bacon residue and onions and garlic into that deglazing liquid - for about 2 minutes. When that liquid nearly evaporated, we took a measuring cup and carefully took some of the pasta water and added that to the onion mixture to keep the moisture going. You don't have to use white wine, alternatively you can just use the pasta water for this whole process!


THEN! We added the chopped chicken and bacon and stirred that in and THEN we took some tongs and tranferred the pasta directly to the sauce, using the tongs to stir it all together. Finally, we added 1/2 of the cheese (1/2 cup) reserving the other 1/2 to put over the top. Final stir and you are done!

We added some cheese over that and we were done! Super yummy Chicken Bacon Pasta with some for leftovers - all that left to do are the dishes!


We'll take a moment here to say this is our first post in OVER 14 YEARS. We started this blog 20 YEARS AGO and our heyday was definitely 2006-2008 - before a set of twins showed up and threw our schedule all out of whack. Those twins are now 17 years old and going to be seniors in high school looking at college! Who knows, if they depart perhaps we'll have the time back that we had 20 years ago to start documenting our cooking again! Thanks for visiting.


Tuesday, February 26, 2008

Buttermilk Bacon Skillet Cornbread

Our first attempt at cornbread came out tasting unfamiliar to us - it was dry, it wasn't sweet, it was crumbly... we were like eh? what happened to this?

Little did we know - there is a difference between Northern (where we're from) and Southern (where we're not) cornbread. Unfortunately, we only discovered this AFTER we got our cornbread recipe out of the otherwise-fantastic Ultimate Southern Living Cookbook. This invaluable recipe resource was a wedding gift to us from my cousin Emily and her family - and it's been used quite a bit.

However, this Southern cornbread recipe - one tablespoon sugar? Shortening, not butter? We gave it a shot and later - through online research - learned that Southern cornbread is more of an everyday bread so it's less sweet and more like actual bread. The cornbread WE were looking for was the denser, sweeter cornbread we were used to - being, youknow, from the North and all...

So we gave it a second shot and scored a homerun with this Northern Bacon Skillet Cornbread... It was sweet and smokey and delicious.

  • 4 bacon slices, cooked and bacon fat preserved
  • 1 cups corn meal
  • 1 cups all purpose flour
  • 2 tablespoons baking powder
  • 1 teaspoon salt
  • 1/4 cup sugar
  • 2 large eggs
  • 1 cups buttermilk
  • 4 tablespoons (1/2 stick) butter, softened

Preheat your oven to 425 and cook up your bacon. Drain the bacon pieces on paper towels and pour out the bacon drippings into a small bowl. When cooled, break up the bacon into ~1/4 inch chunks.

Take your cast-iron skillet and pour in the ~2 tablespoons bacon drippings (or just use a 13x9x2-inch metal or glass baking pan). Tilt skillet to coat bottom and sides of pan with bacon drippings. (Or, if cooked earlier and the bacon drippings have congealed, you can use a paper towel and just "grease" the skillet as you would with shortening.) Place skillet in oven until bacon drippings are hot, about 6 minutes.

While that's heating, sift together the flour, baking powder, and salt into large bowl - and add the cornmeal. Stir in sugar. Whisk eggs and softened butter in another bowl to blend, then add to dry ingredients along with the buttermilk. Stir - "creaming" the butter in with a fork - just until blended. Before your very last stir, throw in the bacon chunks and perform the final stir...

Transfer batter to that prepared hot baking pan - batter should sizzle when it hits the pan. Bake corn bread until tester inserted into center comes out clean and top is golden brown, about 25 minutes. Cool as long as you can stand, but best warm! Cut corn bread into wedges - or squares - and enjoy.


Dense, smokey, sweet, crispy edges, cakey inside... We enjoyed ours with a great field greens salad with beets and oranges, and a nice piece of one of two chickens - hot off the grill outside! Grilled chickens, cornbread, and salad - our own version of Southern Cooking!


Thursday, February 07, 2008

Bacon Toffee


Yup, bacon candy!

As we stumbled across blog posts for Bacon Toffee, we looked at each other and said "bacon candy?!?!" and laughed... but as we read the various rants and reviews and posts around the web - we decided we had to make some to bring to our Super Bowl party! Get it - pigskin? At least the Toffee was a bigger hit at the Super Bowl than the Patriots were... grumble, grumble.

The bacon toffee is similar to the Peppermint Bark we make around the holidays, but this candy is made FROM SCRATCH (oh, and this candy has bacon in it).

We started by crisping up 5 strips of good Boar's Head bacon (and saving the drippings for a Cast Iron Bacon Cornbread...) and set the cooked bacon aside. Then, we started 1/4 cup water in a small-ish, heavy-bottom saucepan over medium-high heat. To that, we added 1 stick of butter and let that start to melt, breaking it up a little bit. Then, we added a big pinch of kosher salt and 1 cup of sugar. Then we stirred.


And we stirred. And we stirred. Keep the heat pretty high and keep stirring as the sugar melts and it all becomes a liquid, then starts bubble and turn sort of candy-like (kind of a sticky gel) and begins to turn tan. About 10-12 minutes of stirring later, you'll have a nice tan-brown "toffee" color and a sticky consistancy and you'll be ready to make your candy.

Quickly stir in the broken-up bacon pieces (I said to break them up, right?) and pour all of your stuff out onto a very-lightly greased cookie sheet. And that's it. No refrigeration needed, just wait as long as you can for it to harden up (maybe 2 hours) and then break it up and eat it!

(While you're waiting, fill that saucepan with water and start it on high to boil along with any utensils you used to clean off that hard candy residue).

Surprisingly - or not - excellent! Sweet candied toffee with just a hint of smokiness and a little meat mixed in! Not overly "bacon-tasting" at all, and certainly addictive.

Monday, April 02, 2007

Braised Brussel Sprouts with Bacon


The salad bar in my cafeteria at work has played host to brussel sprouts for the past few months and I scoop them up whenever I don’t pack a lunch. I’m not sure of their cooking method, but however they do it leaves hardly a trace of bitterness. The only way that I’ve ever had them at home was frozen, and then I would just thaw them and sautee them in a bit of butter or oil. This time, I decided to buy them in the raw and see if I could master the art of the sprouts.

I rendered about 3-4 strips of diced bacon in our dutch oven, adding 1 small diced onion about 10 minutes in. After the onions softened, I removed both the bacon and the onions from the pan and wiped out most of the drippings. I had about a pound of brussel sprouts which I had rinsed, trimmed the stems and halve lengthwise through the stem.


I added some olive oil to the pan and sautéed the sprouts for a few minutes before adding 2 cups of chicken stock (not quite covering the tops of the sprouts), a bay leaf and some S&P. I returned the bacon and onions to the pot and let everyone simmer for about 15 minutes.

They weren’t mushy and even my husband liked them enough to eat several! The only thing I would’ve done differently would be to reserve some crunchy bacon to serve on top after they’re plated. We had some DELICIOUS grilled ribeye steaks along with some grilled sweet potato fries with the sprouts. The sweetness of the fries and the slight bitterness of the sprouts played off each other really well!

Sunday, May 21, 2006

Banana Pancakes

We all experience deep-seeded, all-encompassing cravings... sometimes we have to give in.

Which brings us to pancakes! Its breakfast! Its sweet! Its baking (kindof)! Its delicious! WE WERE CRAVING THEM LIKE THE WORLD WAS ENDING! Let's give in to temptation this time.

Of course, we try to avoid just eat a bunch of all-purpose flour with sugary syrup on top. Is there a way to add volume AND some sweet flavor to pancakes? Indeed, bananas can do what we need! We mashed up the very ripe bananas with a fork to add structure to the batter - filling in for some of the flour. The banana, once cooked, also provides some sweet flavor.

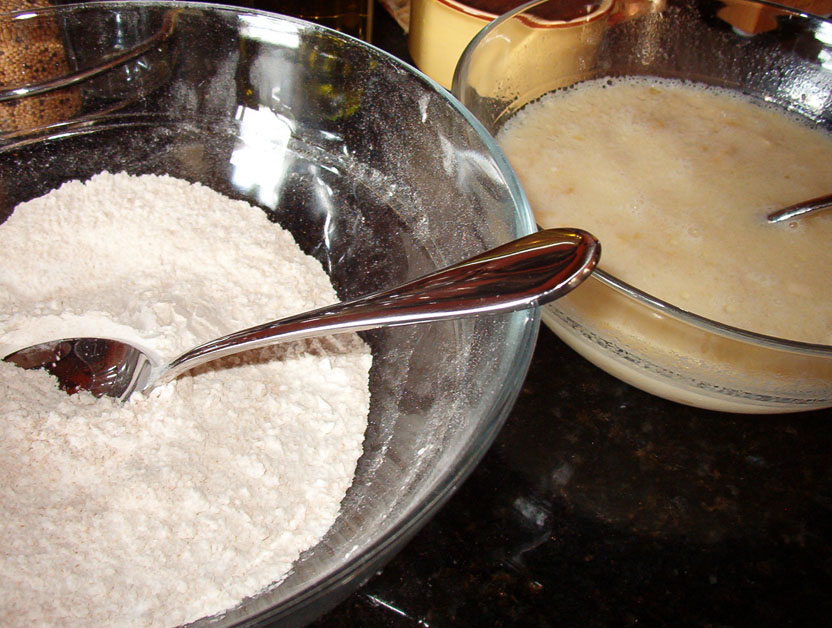
1/2 cup all purpose flour and 1/2 cup wheat flour, 1 tbls baking powder, 1 tbls sugar, and a pinch of kosher salt on the dry side. Two mashed bananas, a cup of milk (our house milk is 1% - yours?), 2 tbls canola oil, and 1 beaten egg on the wet side.


Stir these two together until just combined. Then, onto a heated and buttered pan and about 5 minutes on each side. This ended up making nine 3-4" pancakes. We like ours with a couple over easy!


A little maple syrup and some microwaved bacon (it works - one minute/slice on a plate covered with a paper towel, then taken out and patted dry by another paper towel).

Before and After:

Thursday, January 26, 2006

Our Meat Sauce

There is really no other name for it - tomato-based (pasta) sauce with sausage, bacon, onions, garlic, squash, mushrooms, and fennel and other spices... Ragu, Red Sauce, Meat Sauce, whatever! You get it together and you cook it a while and you take it and pour it over the object of your desire - making pasta, bread, even lawn clippings taste fantastic! (Don't eat grass.) Let's do this - photoblog style!

Meat:
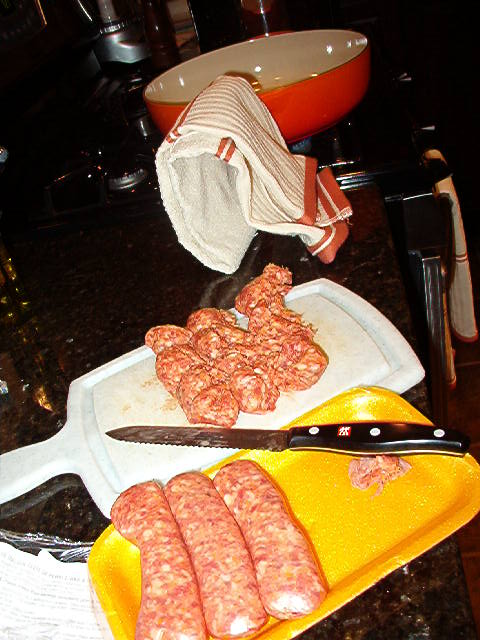
* Hot Italian Sausage (we got Perri) stripped of it's casing
* Bacon cut into one-inch pieces, we had some extra lying around that woulda gone bad before the weekend. Let's use it for the fat (and smokey flavor) in this sauce

Veggies:
onion in little 3/4 inch pieces, diced garlic, yellow summer squash in 1/4 round cubes, sliced mushrooms

Tomatoes:
two cans diced tomoatoes, two small cans tomato sauce

Spices:
freshly ground fennel, salt, pepper, oregano, basil

Pasta:
whole wheat Penne and Rigatoni to fill out the amount we need.

Liquid:

Red wine (cabernet sauvignon) to deglaze (about 1/3 cup)

LET'S GO!

Bacon goes in first to start rendering the fat, while this is going on take the sausage out of it's casing - just make a long, shallow slice lengthwise and turn that sucker out.


Also, get that water going for your pasta!

Add the sausage to the bacon/bacon fat and brown. As it cooks be sure to break it up along the way. As you can see here, we use a splatter screen to - what else? - try and minimize splatter all over the cooktop.


Browned and removed, drain most of the fat, leaving the burny bits from the sausage and bacon at the bottom. Refresh with a little olive oil if you wish and get the onions going. After a minute or so, add the garlic. After a few more minutes the yellow squash is ready to go in. Not long after that, the sliced mushrooms go in.


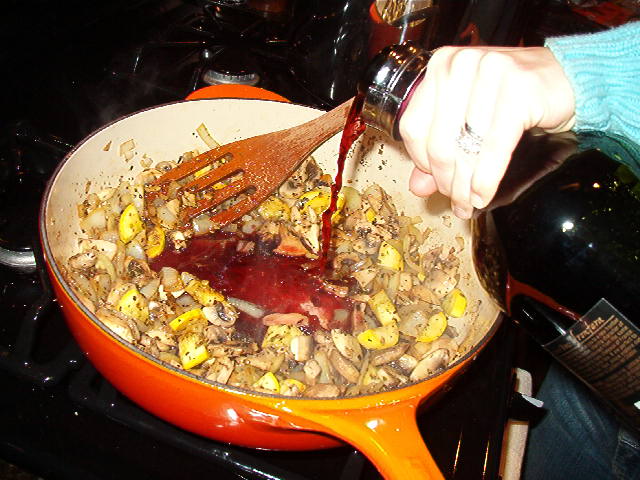
This is a good time to deglaze, although we could have (should have?) done it sooner, too. Add red wine and scrape the pan with a wooden spoon to incorporate the burny stuff at the bottom.

Allow the red wine to get nice and bubblin' to burn off the alcohol and really pull the flavors out of the Cabernet (use whatever you like!)

Cook and gently stir all this for maybe 4 or 5 minutes. With that veggie mixture in place, let's season:

We like adding freshly ground fennel seeds that go great with the sausage. We got this great grinder for our wedding from our friends Trish and Brooks - just throw the seeds in and twist. Voila! Ground fennel. We added fresh ground black pepper, coarse sea salt, and dried oregano and basil. (The tomoatoes we're about to add aren't seasoned at all.)

Spice Grinder w/Fennel:


Mix that together and we're ready to...

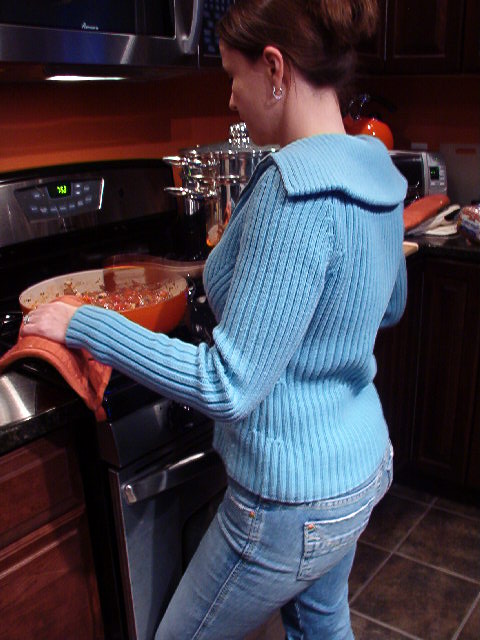
Add the tomatoes - throw them all in. Because we're not adding alot of liquid, the sauce will provide that liquidy texture and allow some time to cook all the flavors together. Once the tomatoes are up to temperature, go ahead and add the meat back in and combine. Set to low, cover with splatter screen, take a deep breath, and simmer.

At this point, a glass of that same cabernet is in order. After as long as you can take - 10-20 minutes, you're ready to go.


Drop your pasta in when you are about 10 minutes away from being ready. We use whole wheat penne and rigatoni tonight, as we had the ends of those two boxes. Boiling, salted water - 10 minutes til al dente!

The final product after some grated parmesan. That is a BIG plate... plenty of leftovers from this dish. We only boil enough pasta for one night, for leftovers we'll boil new pasta and reheat this sauce in the microwave and combine.


SCORE:
* Pasta Sauce Dinner - 9 out of 10. - Gold star - Super Duper - Grade A - Splendid!
The smokey flavor from the bacon and the fennel-y sausage and deglazed veggies are fantastic. We forgot the green pepper - maybe that woulda gave it that last point!

DELICIOUS! See you next time!

The Boston Chef