Saturday, December 30, 2006

Our Year in Review

As we close out 2006, we look back on the year we've had at Boston Chef. We have many things to be thankful for - and many things to look forward to in the next year.

We started this blog in January of this year after moving into our new house - with our new kitchen. Moving from a somewhat run-down, old-stoved, tiny-fridged, no-dishwasher-havin', little-counterspaced kitchen to our new, spacious, all-amenity kitchen has really let our cooking abilities improve and blossom. It's amazing how much more you're willing to do when you know you don't have to wash ALL the dishes and silverware by hand at the end of the day!

As usual, we learn alot from Food Network programs and various recipe sites - but we probably learned the most about cooking this year from all of the food blogs out there that we love and mine for ideas!

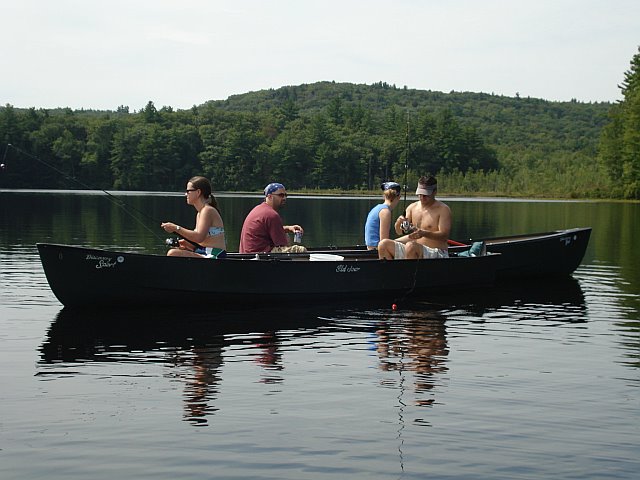
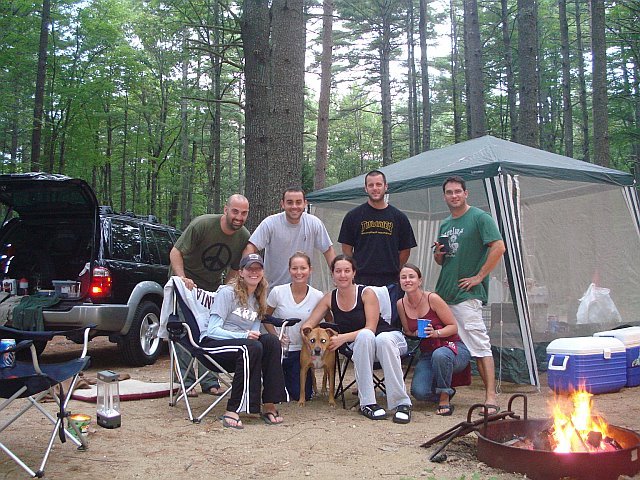
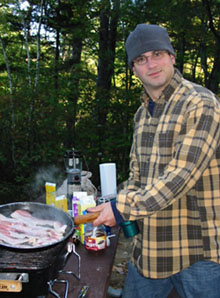
We camped more this year and caught and ate our first outdoor fish and did some cooking over an open fire - and plan on more camping in 2007. We bought our grill for our new back deck - adding another dimension to our cooking that we weren't able to do before (holy crap, the grill was so clean back then!).

We'll be kicking off 2007 with a BANG, as we're having a New Year's Party here at Casa del Cocinero de Boston - featuring a whole ham on the grill, ultimate veggie platter, peas with prosciutto, famous baked mac and cheese, crab stuffed mushrooms, beer, wine, and champagne, and much more!

We read through all of our posts from this past year and decided to put together a Top 5 list. Two Top 5 lists, actually... one from Stacey and one from Michael - with action photos!!!

Stacey's Top Five:

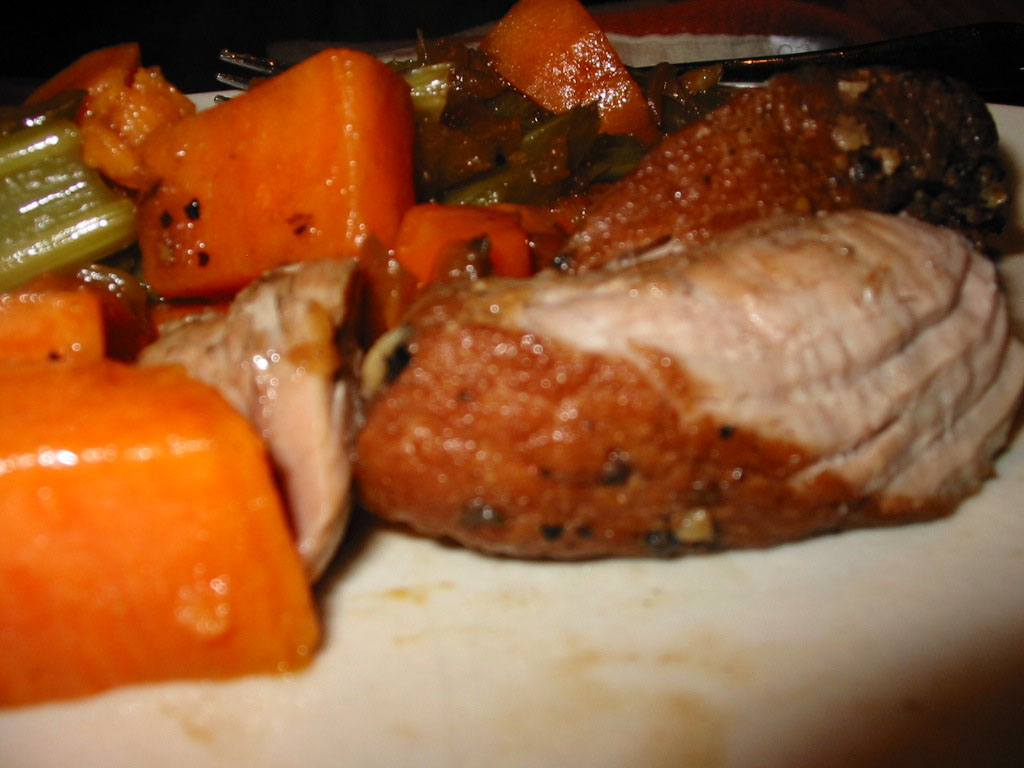
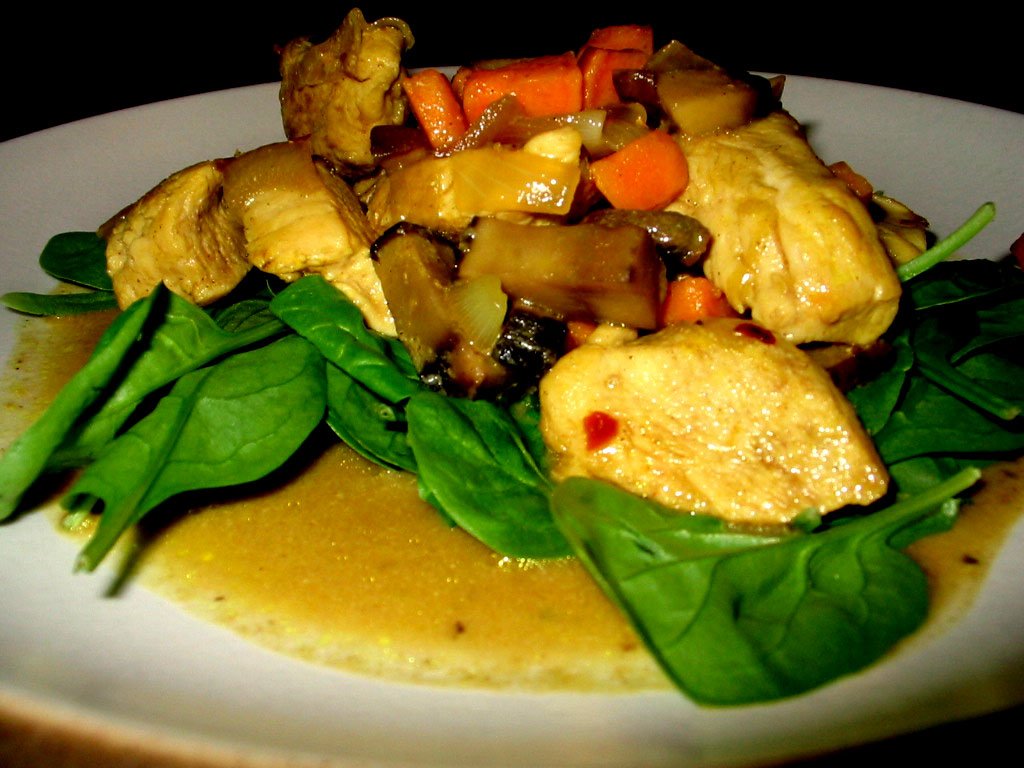
5. Beef and Vegetable Stew - great leftovers, too!
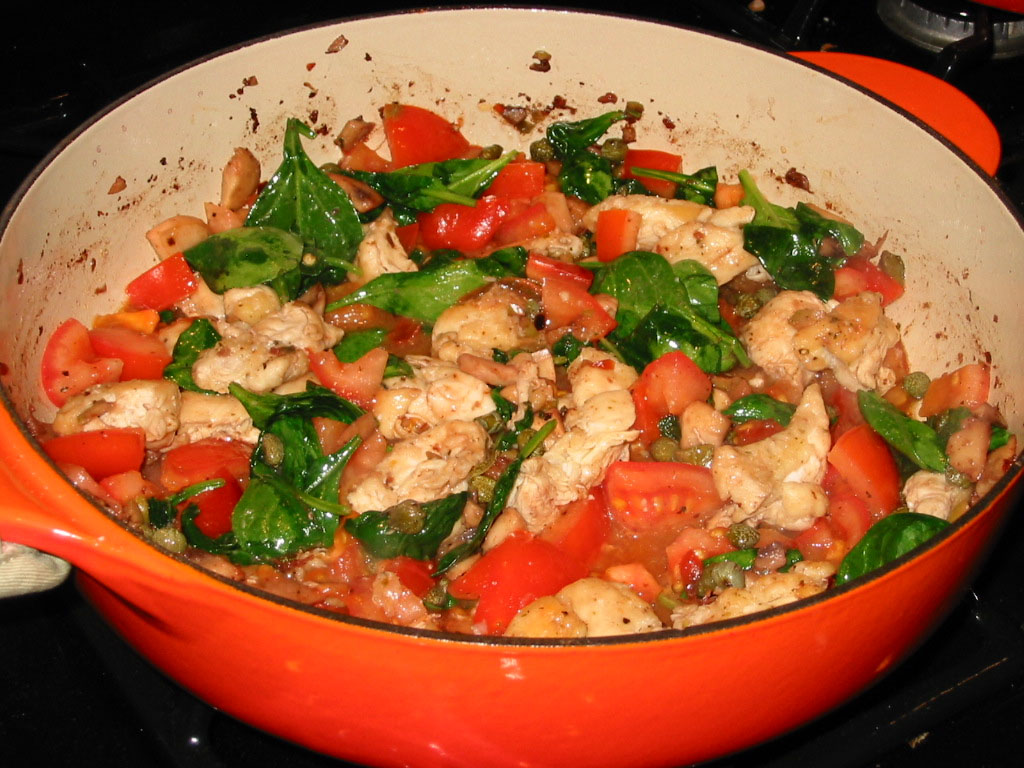
4. (Tie) Paella - an oldie but still a goodie!
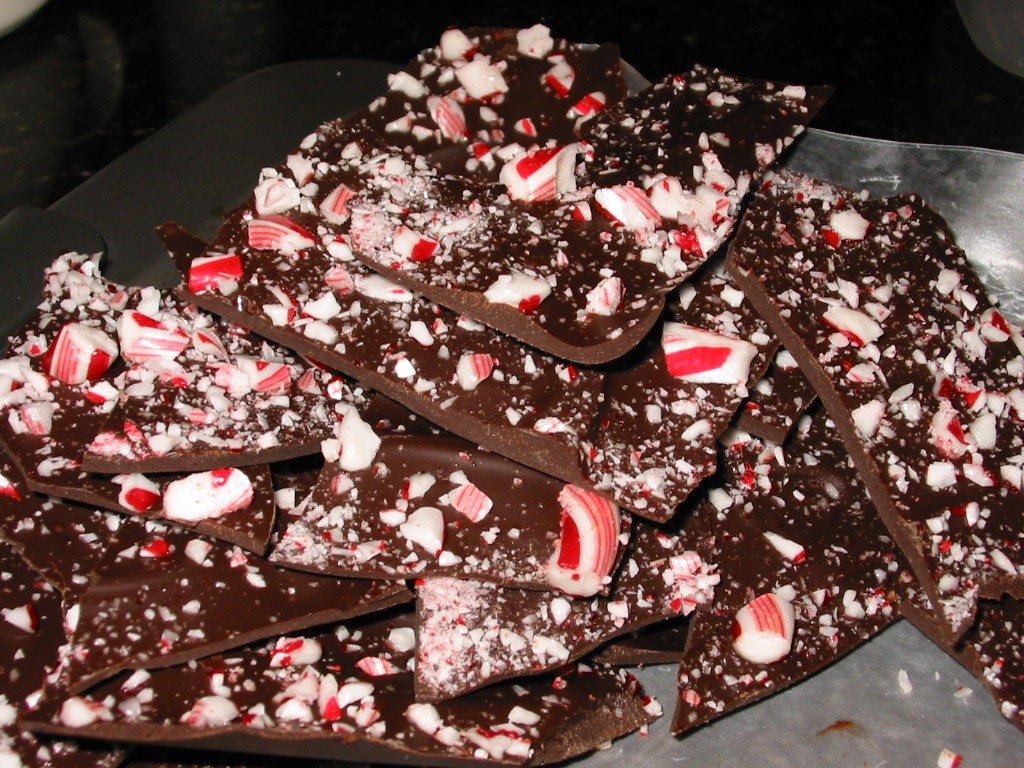
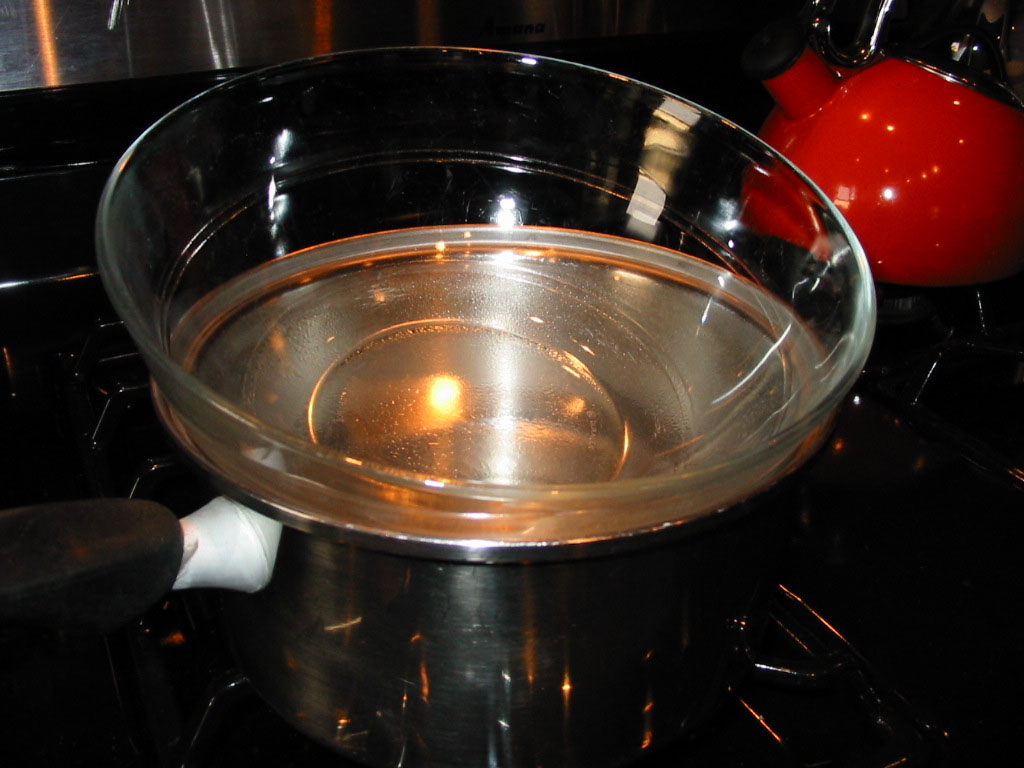
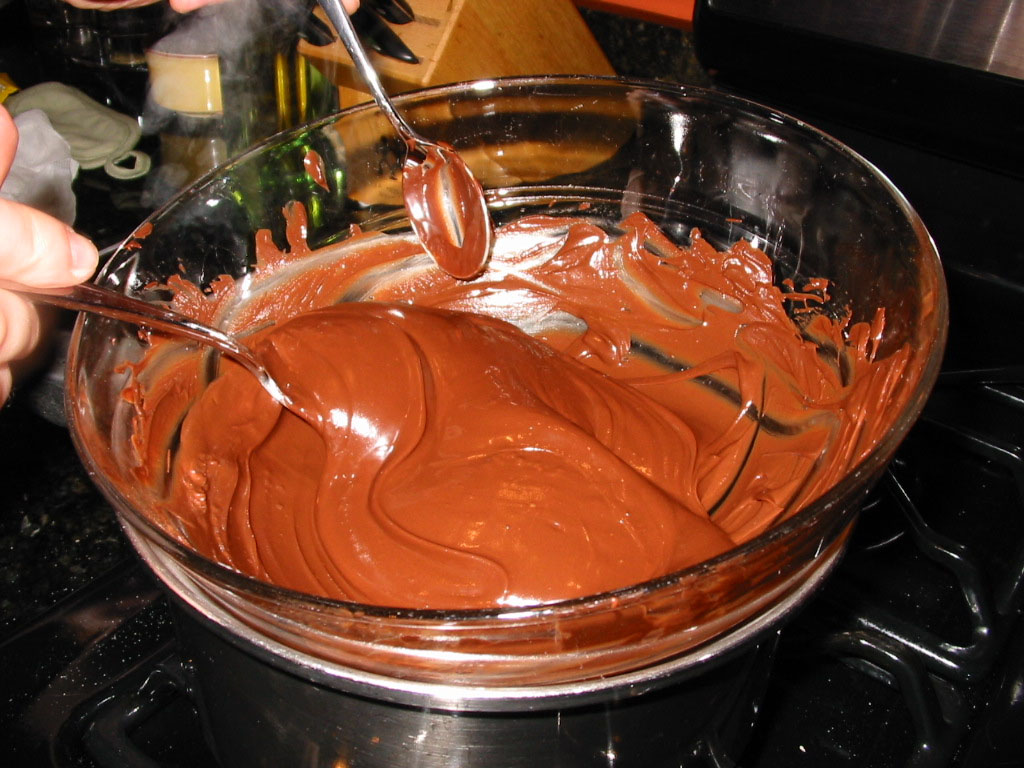
4. (Tie) Peppermint Bark - love this easy holiday recipe, we put some in old cookie tins which made great gifts for Grandmas!
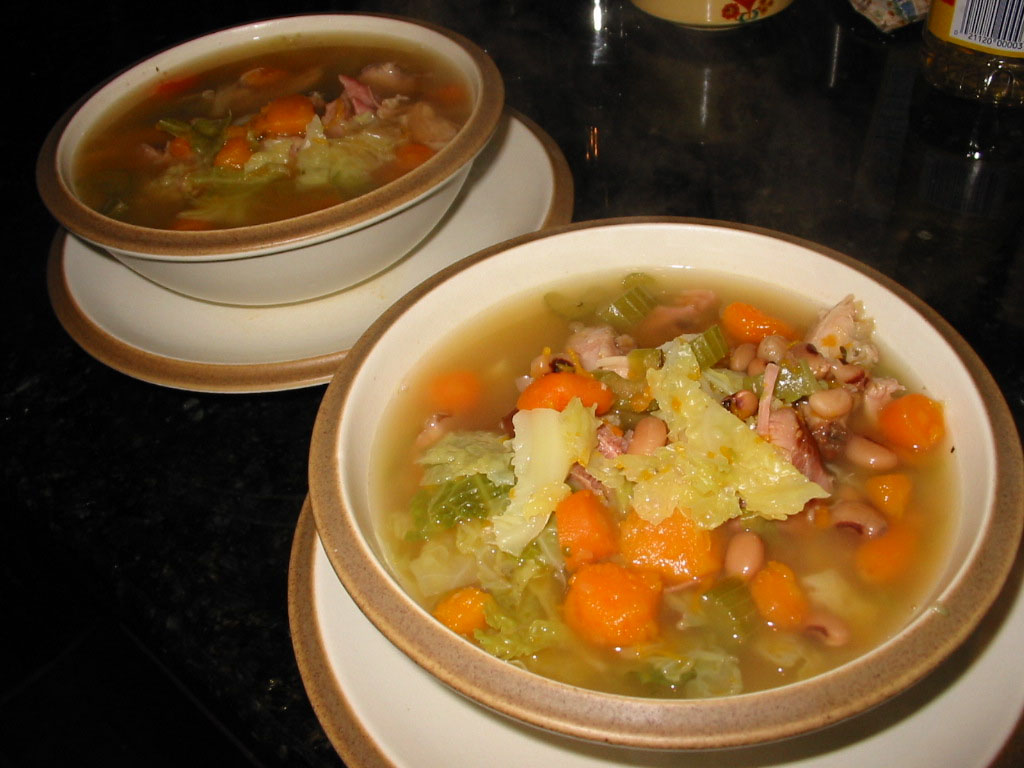
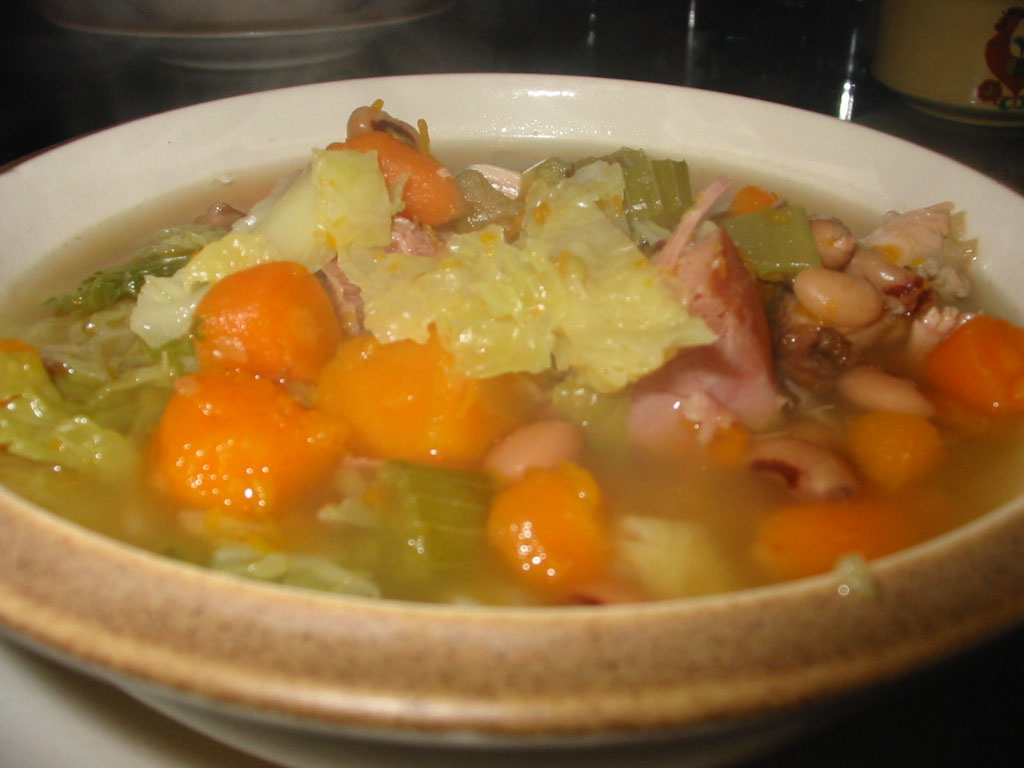
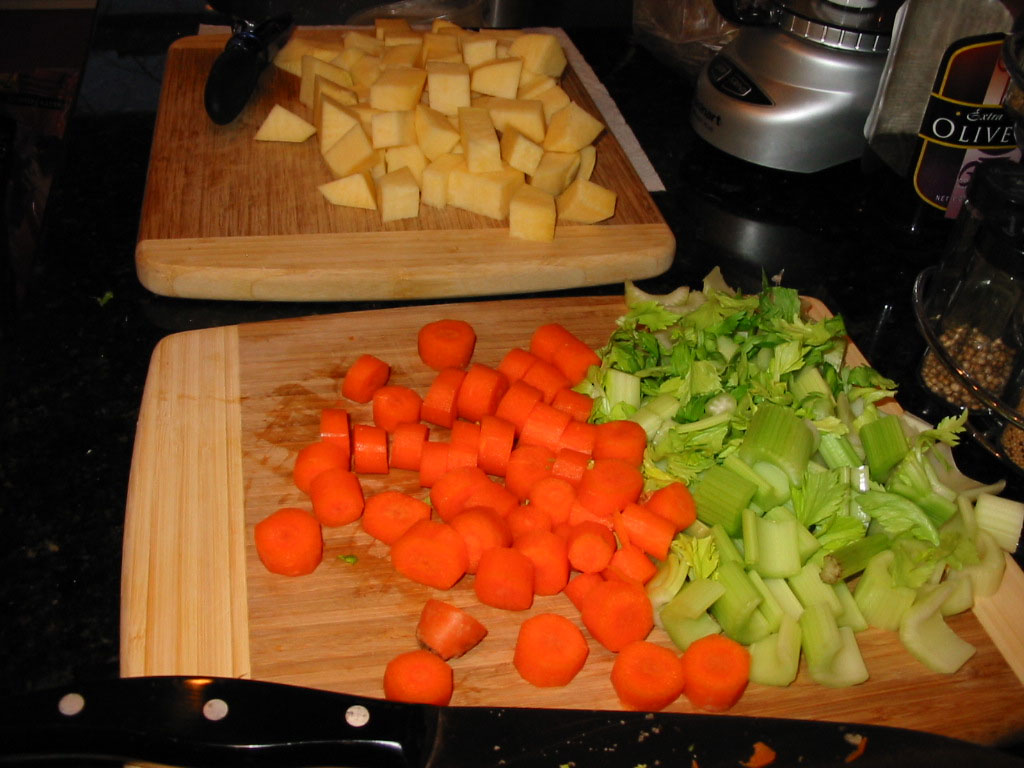
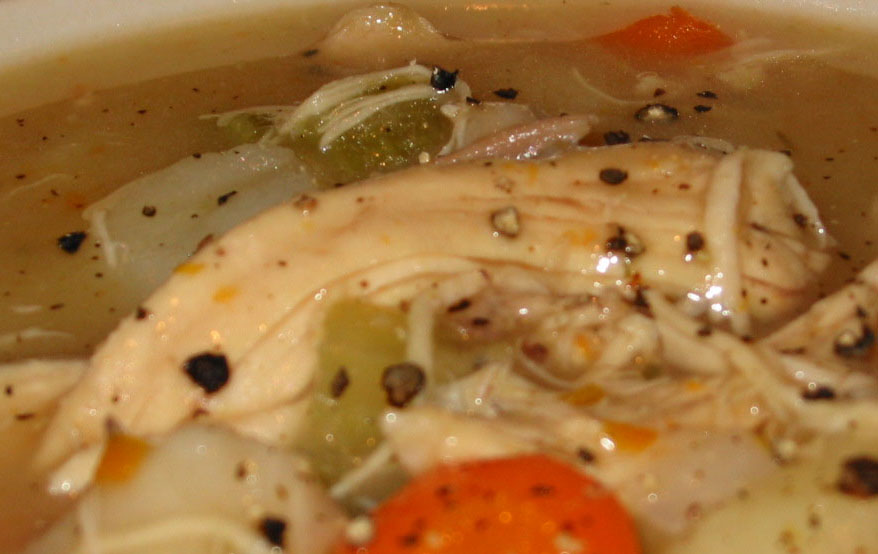
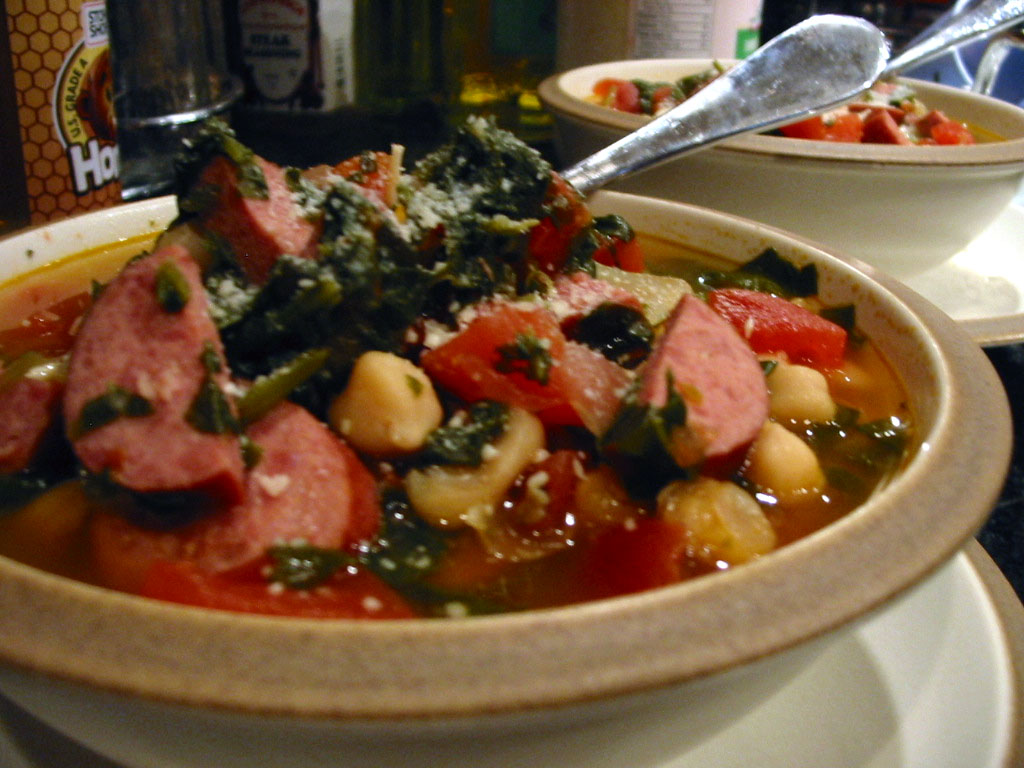
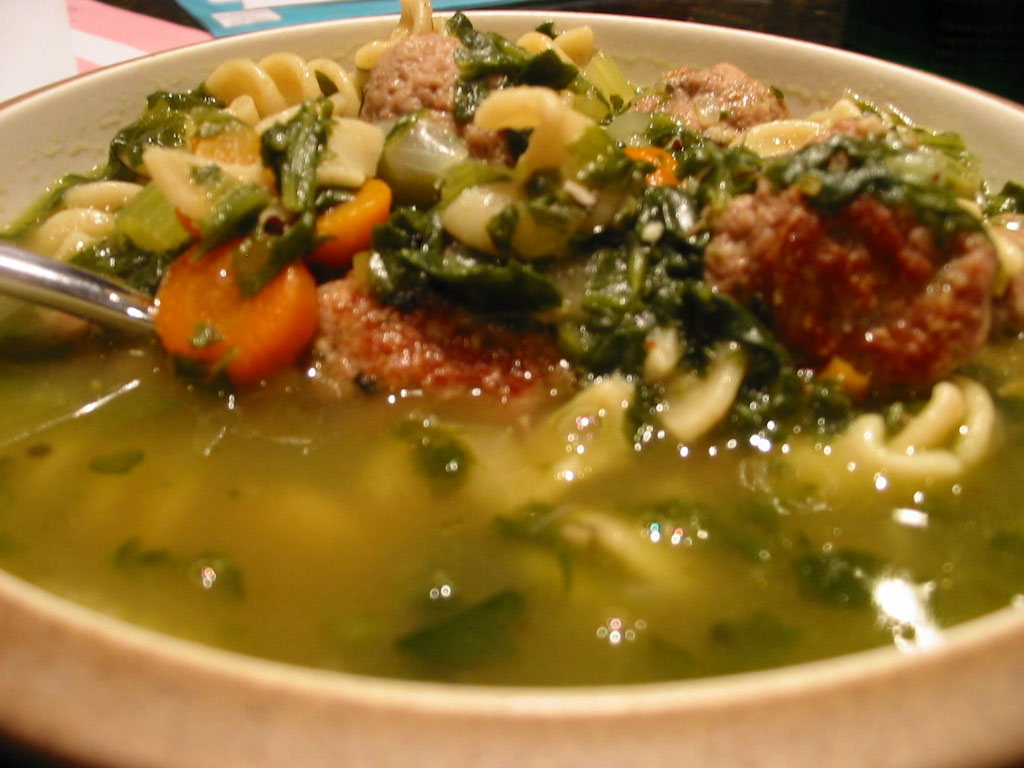
3. Sausage and Bean Soup - a pleasant surprise on the list, the dark horse in the race!
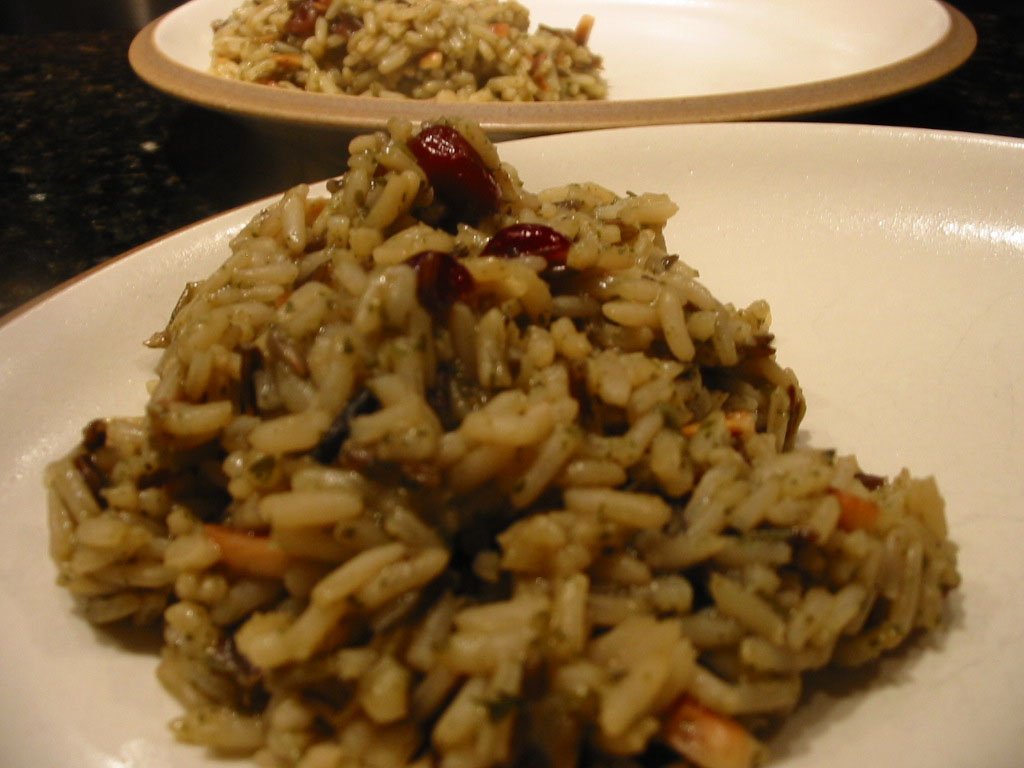
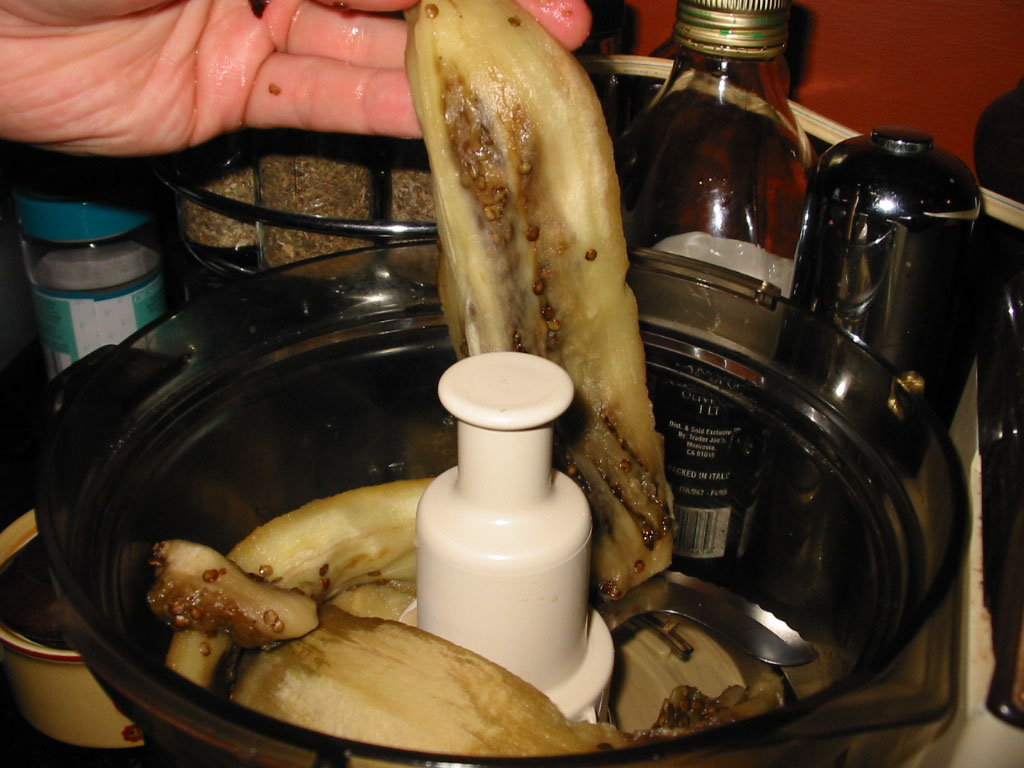
2. Stuffed Acorn Squash/Eggplant Parm (both using Our Meat Sauce) - any use of Our Meat Sauce is good!

And Stacey's #1 for 2006...

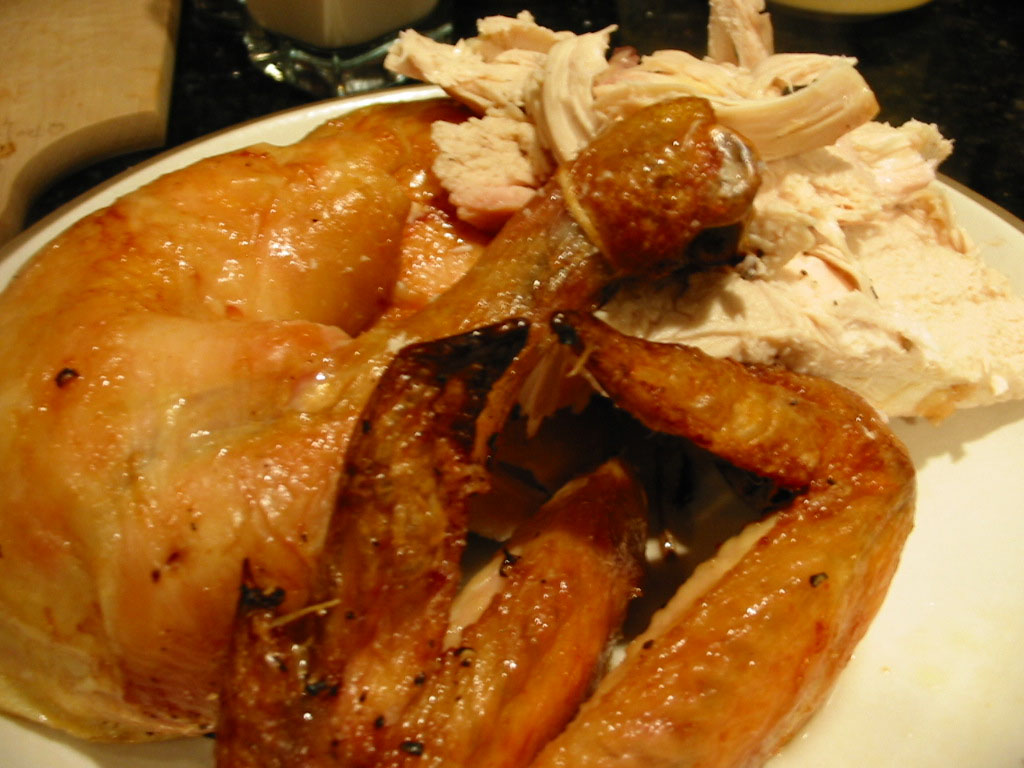
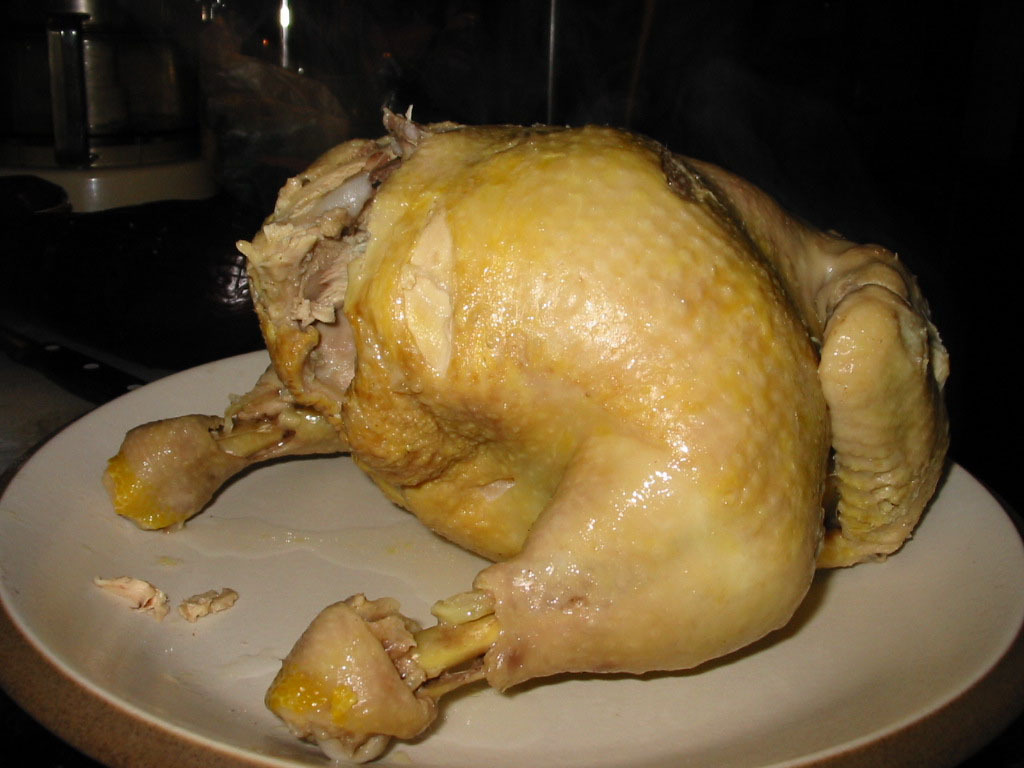
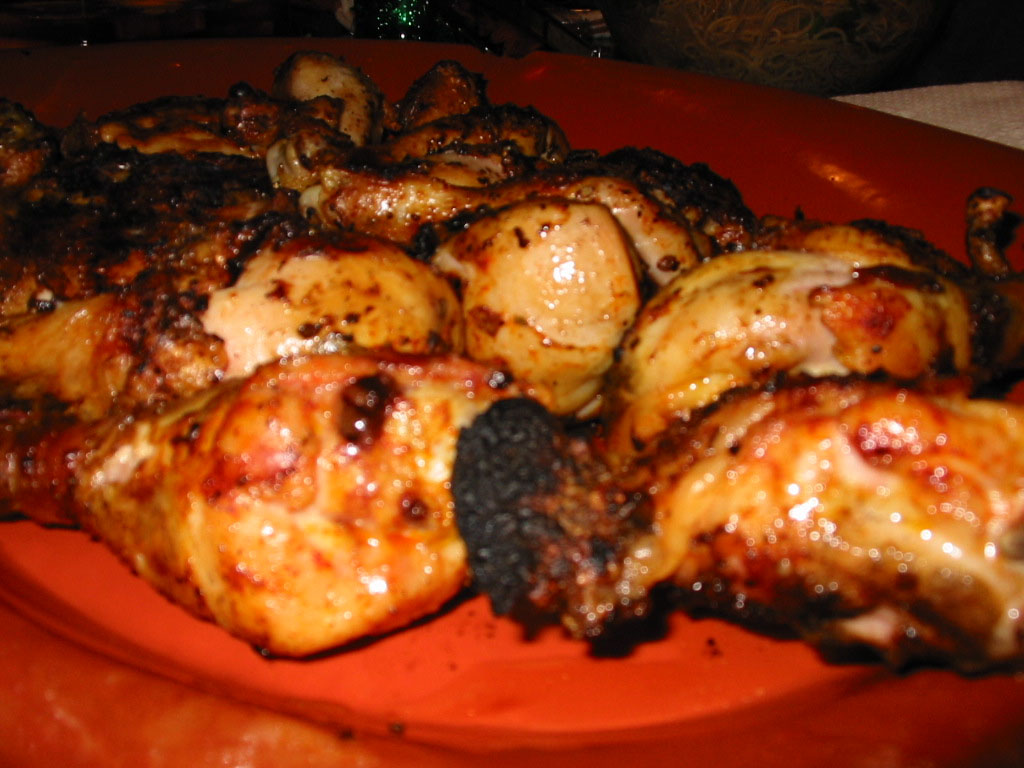
1. Brined Chicken! - a new technique which we now use when cooking any poultry, we applied it to grilled drumsticks, broiled chicken legs, more grilled chicken, roasted whole chicken... basically anything with wings!

Michael's Top Five:

5. Who We Are! - our introductory post, can't believe it was almost a year ago...
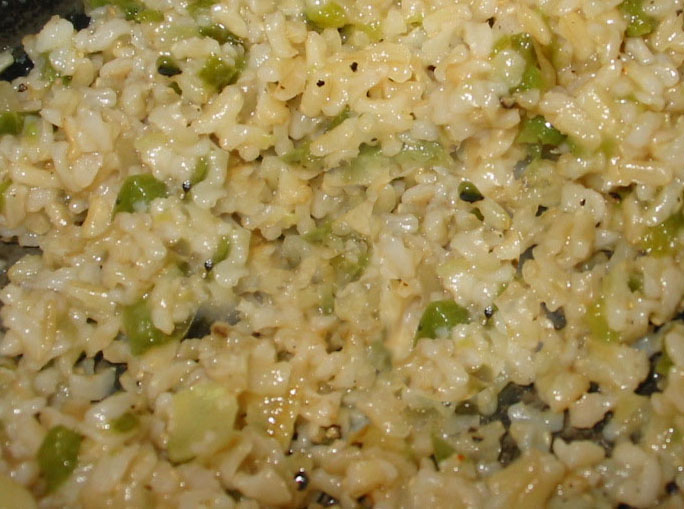
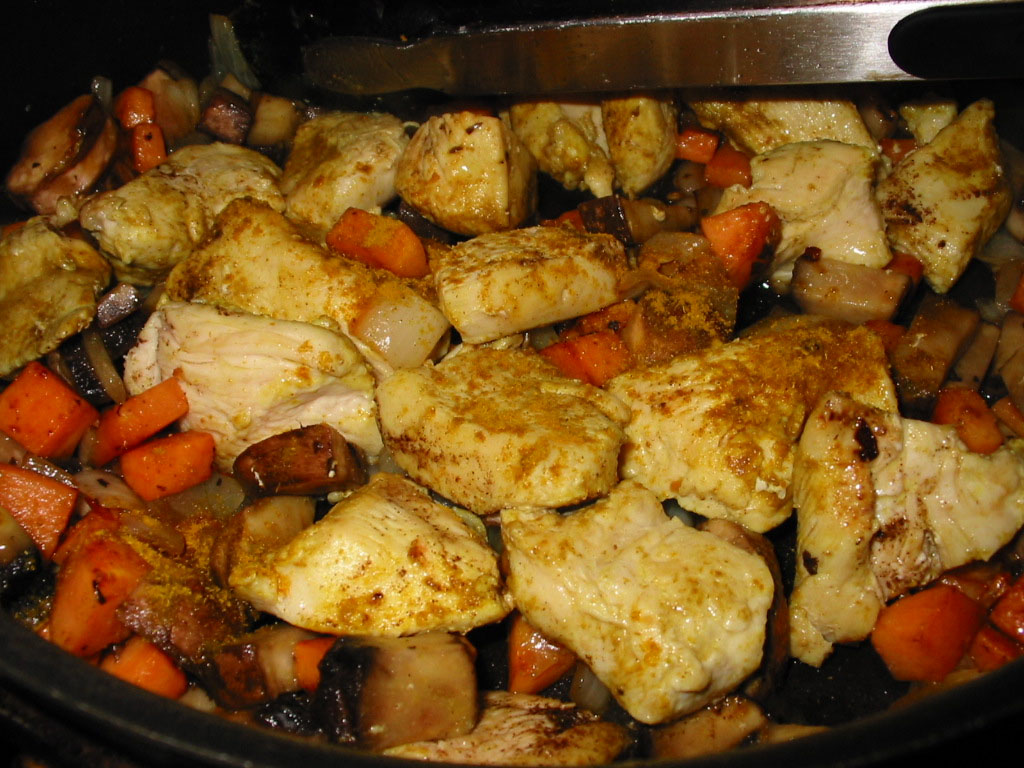
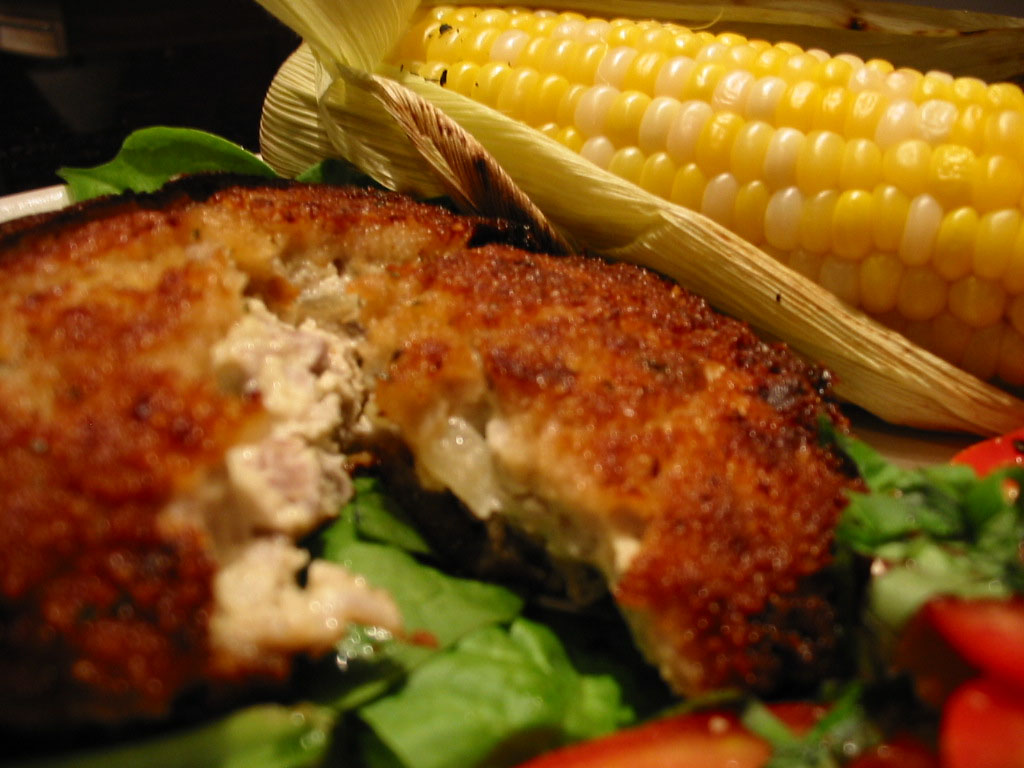
4. Pork Fried Rice - this came out really, really good!
3. Our Visitor - ok, one non-cooking post on the list... our visit from nephew Jack!
2. Our Meat Sauce - looks like we have a consensus at #2 in our Ragu.

And Michael's #1 for 2006...

1. Grilled Whole Trout! - maybe our most famous post, certainly our most commented on - and definitely delicious!

Happy New Year! See you in 2007!

Love,

The Boston Chef

Thursday, December 28, 2006

What We've Eaten II

We've been out of town, but we've still been cooking and eating! We had a great Christmas visit to the homeland - Northern Maine - where we cooked a 10-lb turkey on Christmas Day. Along with that, we had mashed potatoes, boiled turnips, stuffing, green beans, cranberry sauce... the works.


We brought home at least four pounds of that turkey so we are still reaping the benefits - we made a "Turkey Surprise Soup" last night which consisted of anything we had in the cupboard along with shredded turkey. Sauteed onion, carrot, and garlic; deglazed with a little red wine and vinegar; added chicken stock and some leftover herbs (oregano and thyme) and seasonings (see below!); added one can of kidney beans, one can of yellow wax beans, one can of tomato sauce, one can of button mushrooms, some frozen green-and-red pepper strips, and the shredded turkey. Cooked that for about 1/2 hour and ate it hungrily - it even seemed to help clear up some lingering colds that we're trying to shake!

Seasonings... One of the BEST Christmas presents we received was a collection of spices from Penzey's! French sea salt, tellicherry peppercorns, mexican oregano, cumin, smoked paprika. Also, some blends - Lemon Pepper Seasoning, Fox Point seasoning (very chive-and-shalloty - had some with scrambled eggs this morning, really good!) and Old World Seasoning which is a blend of just about everything... Plenty of the Old World Seasoning went in our "Turkey Surprise Soup" and really made it savory and delicious...

Before we left for Maine we cooked a quarter-ham, knowing that we were doing turkey instead of our traditional ham for Christmas in Maine this year. Glazed, smokey, and tender, it was delicious with some mashed sweet potatoes: Just peel and cut two sweet potatoes into 2-inch chunks and throw them into some salted boiling water for 10-14 minutes (Although Alton Brown says you should steam sweet potatoes instead of boiling prior to mashing). Drain them and return to the hot pan to burn off some of the residual water. Season with salt, pepper and whatever else tickles your fancy... sautéed garlic or a bit of Penzey’s Cajun Seasoning. Add a few pats of butter - or margarine/promise/whatever - and a couple tbsp of milk, half-n-half or cream depending on your dietary needs. We used promise and 2% milk and a splash of half-n-half.

We sliced the ham and enjoyed it with the mashed sweet po's with some green beans - along with a big dollop of dijon mustard.


We also had our famous Pasta Puttanesca earlier last week - but with twist.. we added fresh baby spinach to our normal recipe. Added some green and a little crunch, it was pretty good!


We'll be back with one more post to wrap up the year - our 5 favorite Boston Chef blog posts from the first year (over 50 to choose from!) - tell us your faves in comments if you like. Thanks for coming... and Merry Christmas!

Monday, December 18, 2006

Peppermint Bark


First of all: thanks, Just Braise! We used Just Braise Stacey's recipe as inspiration for our own version of Peppermint Bark because it was so simple and looked so delicious on her site.

Like Stacey, we also hear all about Williams-Sonoma's Peppermint Bark - from my brother singing it's praises to Williams-Sonoma catalogs and stores to it's mention in food blogs... blah, blah, blah! It's $25/pound! For that price, I better be eating some grass-fed, locally-grown, aged beef or a blood-red piece of tuna right off the boat! Even those things aren't $25/pound - and I can't make those at home...

All this recipe takes is a bag of Nestle Chocolatier's Dark Chocolate Chunks ($3.99/10oz), peppermint extract ($3 for a bottle that will last us for many Christmases to come), and a rack of candy canes ($1.99/10). That's it.

First, construct a double boiler out of a sauce pan and a mixing bowl - glass or metal - that just fits down into the sauce pan but is suspended from the bottom. Put an inch or two of hot water in the saucepan and turn the heat on medium-high so it get's simmering and steaming, which will produce the heat necessary to melt the chocolate in the mixing bowl:


Pour those chocolate chunks in and get to stirring! Add a little capful of peppermint extract as your chocolate is getting smooth and give a taste. Add more peppermint until you have a delicious dark chocolate and peppermint combination... flavor it to your taste. We ended up using maybe two little capfuls.


At the same time, drop half of those candy canes in a paper bag - we used five of 'em in the bark and hung the other five on our Christmas Tree, for now - then fold up that bag and head out on the deck with a hammer. Smash those candy canes up good on the deck railing (seemed like a good place to do it) until you have big chunks, little chunks, and even powder. The paper bag won't rip and possibly get some plastic mixed in like a ziplock or plastic shopping bag might.

When you've got nice, smooth chocolate flavored with peppermint to your taste, pour it out onto wax paper that is laid over a cookie sheet and smooth it out into a nice, thin layer - about 1/8" thick - with a spoon. Immediately start spreading around your crushed candy cane...


And that's it! Into the fridge for as long as you can stand... we were picking at the edges within a couple of hours. After about 5 hours in the fridge, we took it out and broke it up into large chunks and we were bringing some to our neighbors shortly after that. It came out better than we had even expected, it is crispy and chocolatey and delicious! Enjoy!

Sunday, December 17, 2006

Mexican Lasagna

Welcome to another addition of What Do We Have In The House??? We were out later than we thought doing some Christmas shopping and just wanted to get out of the crowds and get home without going to the grocery store. Once home, we scavanged through our fridge and cupboard and found: a package of ground turkey, a can of black beans, a can of corn, 1/2 package of wheat tortillas, a package of "taco" cheese, a small jar of pimento, a can of stewed tomatoes and a can of tomato sauce, and a big ol' zucchini. No problem, let's assemble some sort of Mexican Lasagna!

Browned the ground turkey and seasoned it at the end with cumin, chili powder, oregano, red pepper flake, and kosher salt... removed to a bowl when brown and already smelling good.


Cut up the zucchini twice lengthwise, then into little half-quarters and added it to the saute pan to start them softening. Seasoned the zucchini with the same mixture.


After four minutes, added the pimento which had been sliced up... then the can of black beans... then the corn... then the tomatoes and tomato sauce. Combined and tested the seasoning and started the oven on it's preheat to 400.


Added the turkey back in and made sure everything had a chance to come together and mingle. Got out a big, glass baking dish and started are Lasagna "layers" with a layer of torn wheat tortillas on the bottom, followed by some big scoops of the meat-and-veggie mixture, followed by a layer of the taco cheese. Repeated with a layer of tortillas, layer of good stuff, and a final layer of cheese at the top.


Into the 400-degree oven for about 30 minutes, until everything is bubblin' and the cheese is melted and brown on the top! Enjoy with a seat and a beer - a great, quick meal after a long day shopping... WITH leftovers!

Thursday, December 07, 2006

Smoked Turkey, Cabbage and Black-Eyed Pea Soup


Every once in awhile, while watching either Emeril or Paula Dean, we hear them mention that you can use smoked turkey legs instead of ham hocks in soups or greens recipes. Count us in!

We are in full soup-season swing here in New England. As you can probably tell, we like nothing more than sitting in the kitchen on Sundays, watching our beloved Patriots, and constructing a soup all day that is ready for supper, leftovers, AND a freezerbag or two. This past Sunday was no exception (and the Pats won a close one!)...

They have smoked turkey at our local Stop and Shop - it's not fully cooked, but is "smoked"... We grabbed about 3 smoked turkey legs and a couple of smoked turkey wings and threw them in about 12 cups of chicken stock and water and low boiled them for about 15 minutes before adding some veggies that were cut into 1 inch cubes: 1 onion, 2 cups carrots, 2 cups celery and 4 cloves minced garlic.


For seasoning, we threw in some bay leaves, thyme and black pepper. After another 20 minutes, we took out the turkey, removed the skin, chopped it up and put it back in the pot. Our kitchen was smelling smokey-delicious at this point!


We skimmed off the fat, scum, froth, etc and then reseasoned a little - then threw in 2 cans of black-eyed peas and 2 cups of cubed butternut squash. After bringing the soup back up to a boil, we then added 1 head of Savoy cabbage which had been shredded.


Cooked for 30 more minutes, and ta-da a wonderfully smoky bean and cabbage soup!

We'd give this soup about an 8/10. It needed more seasoning to put it over-the-top, not sure what (more pepper!). And I probably would have thrown in rutabega or white potatoes in instead of the squash - which seemed too sweet for the dish. 'Til next time!

Wednesday, November 29, 2006

30-Minute Chicken Roulade and "Dirty" Rice

Believe it or not, we have not always been into cooking our own meals. We did have very rudimentary knowledge of cooking early on and applied some of that knowledge to cooking on occasion, but often we were cooking Hamburger Helper and freeze-dried mashed potatoes other sort of pre-made meals. We don't necessarily look down on these methods for getting food on the table, but we do look back while we're making a roast or braising short ribs and say "remember when we'd make Tuna Helper???" and laugh a little.

Our learning curve was an extreme one, and it was certainly accelerated with some help from the Food Network. In particular, we'd watch Rachael Ray's 30-minute meals. Yes, she's blown up today with her shows and magazines and there are entire sites out there that bash her and she's too perky and her cooking is too elementary, etc., etc... but back then she was making advanced meals for us at the time! And we thought: we can do that! We'll always have a little place in our cooking hearts for Ms. Ray - even if today WE even find her cooking a little elementary!

So here's our dedication to her - this is 100% our own recipe, but it certainly seems like it could be one of her 30-Minutes Meals. Hey Rachael - you can use this recipe! Just drop us a line first!

30:00 - gather: two boneless/skinless chicken breasts; a few deli ham slices; a few fresh sage leaves; some bleu cheese (we bought a big block - i LOVE bleu cheese); saran wrap; a big, metal, heavy-bottomed pan for smashing; and put a skillet on the stove on medium heat.

28:00 - butterfly the chicken breasts by putting them flat with the "meatier" side to your right (if yer a righty) and slicing - one knife-slice at a time - back through the middle from the right to left, slicing sideways almost to the end but not through (does that make sense?).

26:00 - lay your butterflied chicken breast down on a layer of saran wrap and cover with another layer of saran wrap. moisten both of these layers with saran wrap with a sprinkle of water to lube them up a little (thanks, Alton!). take your heavy-bottomed skillet (not the one on the stove top!) and flatten those breasts to about 1/3" thick... as flat as you can get them without ripping them apart.

24:00 - add some canola oil to the pan. take each flattened breast and at one end place a slice of ham, a sage leaf, and a cut or a few crumbles of the bleu cheese. then roll the chicken breast up around that "filling" until you've got a little, round chicken roll-up. secure with three toothpicks. maybe it's not a real "roulade" - but that sounded better than "chicken roll-up"! season the outside of the chicken rolls with kosher salt and fresh-ground pepper.

22:00 - add chicken roulades to pan and start browning on each side, 3-minutes per on 3 sides.

21:00 - while that is going on, get out your 10-minute brown rice and get one cup of water going to make your one cup of rice in. also, gather 1/2 a green pepper, 1/2 an onion, and a couple garlic cloves.

19:00 - turn chicken. dice up your pepper, onion, and garlic. add a last, smaller saute pan to some heat. put rice in boiling water and return to a boil and cover and simmer for 5 minutes (as it says on the package)... add some canola oil to the smaller skillet.

16:00 - add your pepper and onion to your smaller skillet to start them sauteing..

15:00 - turn chicken

14:00 - take sip of wine. stir veggies.

13:00 - check rice - if most of the water is evaporated, just turn off heat, give it a stir, and put the cover back on.

12:00 - last chicken turn. stir veggies and add in the garlic. season with salt and pepper.

10:00 - sip of wine. leaf through Penzey's catalog. smoked spanish paprika! mmmmm...

9:00 - keep stirring and sauteeing those veggies... should be done soon, so turn off the heat.

8:00 - chicken comes out, temporarily. should have some nice saute bits at the bottom of your pan, pour in some of that Cabernet you have - 1/2 cup? - and a big pat of butter! deglaze the pan and scrape off the bits at the bottom.

6:00 - add the chicken back in, turn down the heat, and cover.

4:00 - add your "dirty" to your rice - put the seasoned-n-sauteed pepper/onion/garlic mixture into the rice and stir it in. give a taste for seasoning and then just re-cover it. it will stay nice and warm and those flavors will be given time to impart into the rice.


3:00 - sip of wine. give the chicken a turn. hmmmm... Penzey's gift boxes would make a perfect gift for a Boston Chef!

1:00 - check the chicken, should be all set by now. turn off heat.


0:00 - scoop some "dirty" rice onto a plate. add one of the chicken roulades. sit down with your glass of wine and enjoy! the wine/butter-poaching adds great flavor to the ham/bleu/sage filling... and the rice has a nice dirty kick to it! Delicious!

That's all the time we have for today - and remember, a great meal is never more than 30 minutes away! Thanks, Rachael!

Monday, November 27, 2006

Beef and Vegetable Stew

What can you say about a meal of meat and veggies that is cooked on a cool New England Sunday and allowed to simmer for hours... other than DELICIOUS!?!?


We've never taken on beef stew, and we felt that it should be in our arsenal of recipes, so Stacey made it her mission yesterday to deliver.

I coated about 3lbs stew meat in a light coating of seasoned (salt and pepper) flour and seared them in canola oil in our Dutch Oven. I worked in about 4 batches so as not to crowd, and I also added more oil when needed.

After they were browned, they were set aside, and I deglzed the yummy brown bits with 1/2 cup cabernet and then removed the deglaze-juice for later use. Now time for the veggies! I cut up all the veggies in at least 1 inch cubes b/c I didn't want them to disintegrate while simmering for so long!


This time in the Dutch Oven, I used olive oil and threw in 1 onion, 4 ribs of celery and about 6 medium carrots, seasoning with S&P. After 6-7 minutes, I threw in about 12 baby bella mushrooms. A couple minutes more cooking time, then I removed those veggies and set them aside.

Next come the yellow turnips or rutabegas! These are a GREAT subsitution for potatoes to cut down on some of the carbs - and I swear when the dish is finished you can't tell the difference! Saute about 2 cups worth for about 10 minutes and then put the beef in with the turnips.

Let those get to simmerin' and add 4 cups low-sodium beef broth (I like to control the salt myself), a couple tablespoons of tomato paste for "structure" (as Emeril likes to say), the reserved wine and yummy brown bits, another 1/2cup cabernet and a couple splashes of red wine vinegar.

I let that come up to a boil, returned the veggies back to the pan with a bunch of fresh thyme sprigs, a couple bay leaves, and some final S&P seasoning. I covered the pot and set on simmer for 2.5 hours while we watched the Pats game (big win!!!). Towards the end, I noticed it wasn't as thick as I wanted so I dissolved a tbsp of flour in a little water and poured that it, bringing it back to a low boil and then simmering for the last 30 minutes with the cover off. Finally, at that point in the cooking process, I added a cup of thawed frozen peas and a cup of thawed lima beans.

The stew came out really tasty... very tender beef, all the different veggies, and wonderful, subtle flavor. This would definitely serve 6-8 people easily, and because of the volume we froze enough for the 2 of us for another night. Oh and we'll eat the leftovers again tonight!!!!

Thursday, November 23, 2006

Creative Leftovers

HAPPY THANKSGIVING!


Hmmmm... what to eat, what to eat...

Leftover roast chicken + leftover cranberry almond rice = the most awesome chicken salad ever!!

I cut up the leftover chicken - about 2 cups worth - and to that I added about 1 cup of the rice. I then added about a rib and a half of chopped celery, some additional dried cranberries, freshly chopped parsley and a bit of pepper. I then added about 1/2 tsp of curry powder, the juice of 1 very juicy lemon, and 2.5 tbsp mayo.

We served this up over a bed of baby greens and iceberg lettuce scoring a 10 out of 10 for the best chicken salad ever!!!

Our food pictures are terrible lately - we promise to work on that and figure out the focus and lighting!

Tuesday, November 21, 2006

Roasted Chicken

Like boiling water or sweating an onion, roasting a whole chicken is an essential - cooking 101, really. Once you've got your roasted chicken recipe down perfectly, you can always lean on it for a great meal plus leftovers...

Yes, we've done it before, but we are back and better than ever with a tinkered recipe that has been blowing socks off from here to the Charlestown Navy Yard! (granted, that's not VERY far, but you should try driving it..!)

The key update we've made to this recipe is incorporating the oft-used brining process into the run-up to the actual roasting. We modify our brining solution - to accomodate for the longer time needed to brine a whole bird - by dialing down the amount of salt and sugar and allowing the chicken to bathe for closer to 8 hours. So - 8 cups water, 1/2 cup kosher salt, and 1/4 cup brown sugar. Stir this up real good... (Actually it helps to dissolve the salt and sugar in 4 cups water and then add the other 4 cups of water - just easier to stir it well.)

To that briney water solution we added some whole corriander seeds, whole black peppercorns, dried bay leaves, 4 good shakes of Worchestershire, a few dashes of Texas Pete's hot sauce, and a drop of liquid smoke. Stir it up again and put your chicken in! We had a 6lb "roaster"... put it in breast-side down, cover it, throw it in the fridge and go relax for 6-8 hours!

Why the brine? It's easy to see in the results - VERY MOIST WHITE MEAT that could possibly pass for dark meat because of it's wonderful, moist texture. Also, the brine imparts all those lovely flavors over the course of the 8-hour soak... adding salt, pepper, hots, and all the other flavors to the chicken.

Alright, after 8 hours the oven is ready at 400-degrees. Take the chicken out and rinse thoroughly, inside and out, pat dry and then onto the roasting pan it goes. Get a 1/2 stick of butter melting and cut about 4 lemons into quarters and peel 4 cloves of garlic. Stuff the lemon and garlic into the chicken's cavity until it can't take no more, then tie off the legs with water-moistened kitchen twine to hold the lemon and garlic in.

Take a brush and cover the outside of the chicken in that melted butter - making sure to get the wings and drums. Finally, a little sprinkle of kosher salt and fresh ground black pepper over the top seals the deal. Many folks tuck the wings under to help them cook along with the rest of the chicken - but we don't! We like the wings to get nice and crispy - crispy enough to eat the tips of the bones! Yup... that's Stacey's favorite part...

Chicken goes in and turn the oven down to 350-degrees and let 'er go. A good rule of thumb that seems to work for us is 22 minutes/pound (so this 6lb bird was in for just over 2 hours) - but test the temp on the breast looking for about 160-degrees and the drums/thighs for up above 170-degrees. Our skin came out nice and crispy, but we may even start the oven HOTTER next time (like 475-degrees) before turning down to 350 upon chicken insertion.

Take yer bird out and let 'er sit for 10 minutes, then... carve and enjoy! DELICIOUS!!! Came out so tender and perfectly flavorful! We enjoyed ours with Stacey's Cranberry Almond Wild Rice - plenty of everything for leftovers, too!

Monday, November 20, 2006

Cranberry Almond Wild Rice


Cranberries evoke that holiday good-will and yummy food excitement for me. Recently in the cafe at work they had a cold rice dish with plump juicy raisins in it, and it got me to thinking.

Why not simmer some dried cranberries in with my wild rice?? And what could make it even better? Nuts, that's right, crunchy nuts. So while the rice simmered, I toasted some slivered almonds up in a dry pan and I only added them to the rice once the rice had absorbed all the chicken broth.

This makes for an interesting sidedish with any meal! And how did it taste?? Well, M said not too many cranberries please because I only like their tartness in small doses. So I went easy on them, but I could've used more b/c once they plump up and simmer with the rice in chicken broth, their pungent flavor mellows and slightly infuses the whole dish.

Tuesday, November 14, 2006

Baba Ganoush

We had been itching to try our hand at Baba Ganoush for a while, we've always loved it in plates at Boston restaurants like the Red Fez and the West Street Grill... We love eggplant, we love roasting, and we love lemon and garlic - so it is a natural!

Poked holes with a fork in one large eggplant and set it in a baking dish and into a 400-degree oven for just over 30 minutes. That eggplant went through quite a transformation during that time - going from a vibrant, shiny purple veggie to a wrinkled, shriveled-up one... it was quite a fast aging process!


We tested the flesh of the eggplant with a fork and found it to be nice and soft, so we set it aside to cool and pulled out the old food processor, a can of tahini, lemons, extra virgin olive oil, and minced up a couple big cloves of garlic.

When the eggplant cooled, we removed and discarded the very top and bottom and then cut the eggplant lengthwise into quarters. From that configuration, it was pretty easy to just peel the skin off the flesh in a few big strips. After that, it's into the food processor...


Give that a good initial spin while adding the juice of two lemons (about 4 tablespoons). Then add the minced garlic and a few big dollops of the tahini paste and a big pinch of kosher salt. More spinning and then we tried it... it didn't seem to be getting to the consistency we were looking for so we added some olive oil and spun it for a good couple of minutes - that really started to even it out. Consistency where we wanted it, we checked the flavoring and maybe added a little more lemon and olive oil. One last spin and then out of the processor and into the fridge for a good sit.

After about an hour we were ready to go. Chopped up some fresh parsley and added it at the last minute... cut up some soft pita bread and we ate the baba ganoush with the pitas and some pepperoncinis along with a tomato and feta salad! Came out great - the longer in the fridge, the better!

Monday, November 13, 2006

Chicken and Dumpling Stew

Hi there... remember us? We're back and we're going to again be posting our recipes on The Boston Chef. We're excited to get back into the swing of things on our blog and we have a long New England Fall and Winter ahead to find, cook, and post new recipes! Thanks for visiting!


Chicken and Dumpling Stew

We've been wanting to make this old recipe of ours in our new kitchen for quite some time. Finally the weather, our plans, AND our mood allowed for it. This is a recipe that's been passed down from my French-Canadian Memere to my Mom, to me, and although it is somewhat simple and subtle on taste, it is one of the most comforting of the comfort foods out there. This stew is also a meal that freezes well, so if you like to make meals in bulk, this is a winner!

We boiled a whole chicken (5-7lbs) for about 45 minutes, then removed chicken to cool - saving that delicious chicken broth that the water has now become. With a ladle, it's pretty easy to trim off much of the fat that floats to the surface. Our seven-pound bird was HUGE!


With the chicken out and cooling, we started our now-skimmed broth boiling again and added 3-5 boiling onions, a few bay leaves, 4-6 chicken bouillion cubes to bolster the flavor, and S&P, thyme and rosemary and let that go to reduce down and concentrate the flavors...


Now that the chicken has cooled, it's time to start dismantling - removing skin and bones and shredding the chicken into little chunks. Then, after pulling out about 1 cup of the broth for later use with the dumplings, we put the chunked chicken, celery and carrots back into broth and brought back up to a boil for about 15 minutes.

In the meantime, we peeled 3-5 Yukon Gold potatoes and cut them up into 1-inch cubes - the bigger the bitesize the better because you don't want them to overcook. The pototoes go in after that 15 minutes and we started in on the dumplings:

Roughly 2 cups flour, 2Tbs baking powder, 1 tbs onion powder, S&P... and slowly work in cup of reserved broth. Dumpling mix should be sticky but not overly wet. Using 2 spoons, drop the dumplings into the pot. If your dumplings puff up too much, you can always halve them while they're in the pot. They shouldn't be bigger than about 2 inches.

Your stew is done once the dumplings sink, but do cut one in half to make sure they 're cooked all the way through before serving!

Delicious and warm comfort food for a cold, rainy day in Boston!

Saturday, September 23, 2006

Sausage and Bean Soup


Autumn is finally here - as of 12:03 Eastern time this morning, the exact time of the autumn equinox. The two equinoxes every year (autumn and spring) are the times at which the sun is directly over the equator and - theoretically, at least - day and night share equal time of 12 hours in both the northern and southern hemispheres of the Earth.

In the northern hemisphere the nights are longer going forward and, particularily in New England, you'll certainly start feeling a chill in the air. We brought our first pumpkin home yesterday to celebrate our favorite time of year and - after a wet and chilly day walking around to the annual yard sales around Ashmont, Dorchester - we decided we wanted comfort food in the form of soup...

But, what kind of soup? Good old standby chicken and dumpling stew (which we surprisingly haven't blogged on yet, but I assure you we will), a meatball sort of soup or possibly something new. We went with the something new as long as that something new included sausage! Looking around the web, we saw a few recipes that caught our eye... we took aspects from many recipes and came up with our own for sausage and bean soup.

We put our soup pot on and started getting 12 cups of chicken broth boiling with 1 chopped onion and 4 cloves of garlic. In the meantime, we chunked up 1.5 lbs of turkey kielbasa and threw in the sausage along with almost a whole 32oz can of diced tomatoes, 2 cups thawed chopped spinach, 2 bay leaves, ground fennel, salt, black pepper and red pepper flakes.

After returning to a slow boil, add in a 19oz can of garbanzo beans (chickpeas) and a 16oz can of white kidney beans. Slow boil this pot of loving good yumminess for at least 30 minutes more, but, hey, the longer you have time to cook this, the better it will be! Sprinkle with a little parmesean cheese right before serving.

Came out DELICOUSLY - a real nice, spicy kick from the sausage and pepper (perfect for chilly weather!), wonderful, flavorful broth, and lovely green spinach and beans and kielbasa chunks in every bite! Excellent leftovers, too...

Tuesday, September 05, 2006

Braised Pork Picnic (half) Shoulder


We had always seen those huge, 14lb. Pork Picnic Shoulders at various supermarkets and marvelled over their sheer size. However, operating as a two-person team (most of the time) has always steered us towards the pork butts and smaller cuts. Sure, we probably could have asked the butcher to cut one for us, but... we didn't.

Then we discoverd the half picnic shoulder - a wonderful invention of bone-in pork shoulder, but only half the size! And at only ~$1/pound, we were dancing (as a certain Brit would say). We deposited a 6lb half shoulder in our shopping cart - along with some carrots, onion, celery, and garlic - and headed home. After paying for it all, of course.

But what to DO with our picnic shoulder? Roast it? Would come out dry, for sure. Grill it? A good option (sear, then move to one side and keep the other side on low), but again we were afraid of the meat drying out. What is the obvious choice for a cheap cut of meat that ideally could cook slowly for a couple hours and not get dried out? To braise, naturallement!

To braise means to sear and then simmer for a long period of time, either on the stove top or in the oven. The searing was accomplished after removing some of the fat and a large hunk of skin that made up one side of the shoulder, giving the shoulder a light canola oil rub and then a cover of kosher salt and cracked pepper. Additionally, we made several slits in the meat and inserted sliced garlic into the slits... this paid off big time! Introduce shoulder to hot canola oil in a hot enameled cast iron dutch oven and sear for a minute or two per side. Then, out she comes, a wipe down of the pan with paper towels (using tongs) and in with some fresh canola oil and then onions (1 medium), chopped up celery (this is for flavor, not necessarily consumption), and a couple leftover slivers of garlic.

When those ingredients have sweated out, we are ready for our braising liquid. After looking up recipes when we arrived home (shouldn't we do this BEFORE going to the store?) we realized that a popular braising liquid for this pork was unfiltered apple cider. We had none, so we had to improvise. Another recipe had the pork marinate overnight in Coca-Cola. We didn't have the "overnight" part, but we did have the Coca-Cola. Also, when we had made braised shortribs in the past, we included some vinegar in the braising liquid which imparted some nice, tangy flavor. And, we always deglaze the pan with a little red wine. We had some pork bouillion cubes in the cabinet that could fill our the volume with some hot water, too. Finally, Mike likes beer.

So we assembled our braising liquid - a splash of red wine, half a beer (Corona, a summer leftover!), a few glasses worth of Coca-Cola, generous pours of red wine vinegar, and the double pork bouillion cube broken up with about 2 cups of hot water added... smelled interesting and the beer dominated, but we knew that beer smell would mellow over the next hours and everything would meld together.

Settle the pork back in the pan and transferred to our pre-heated 325-degree oven. After an hour, we turned the meat over and had an amazing aroma throughout our house and the meat was already beginning to pull off the bone! After another hour we went to turn the meat back over and checked the temperature at this time... luckily. Temp came back at 180-degrees and the pork was ready to come out! Onto a platter and covered with aluminum it went, but not before a couple of strips were peeled off and eaten - so tender!!!


We then decided to put the leftover braising liquid to good use by boiling some veggies in it while at the same time reducing it. We put the pot back on the stove top and brought it to a boil. Chunk-cut carrots and celery went in for about 10 minutes before we threw in cubed sweet potatoes. Another 15 minutes and everything was done... plus the liquid had reduced by a 1/3 or so.


We cut up the pork based on what looked right - huge chunks - and served it up with the veggies and a little spoon of reduced liquid over the top and a little dijon on the side.

It came out perfectly - very tender and a natural pork flavor. Maybe next time we'll add the dijon right to the braising liquid, but the cooking time/temp couldn't have been better!

Cheers!

Monday, September 04, 2006

August & the End of Summer

As you can probably tell, we are once again ramping up our food blog posts now that summer is coming to an end. Although we've been cooking plenty all summer long, the hot, late days are not exactly conducive to writing about cooking. We are on our fourth tank of propane for the Weber on the deck for this summer, and we no plans to stop firing up that grill this fall. We'll have lots more pics and posts come football season (go Pats!) and autumn - probably our favorite time of year. A preview of grilled drumsticks from a recent cook-out we had with friends at our house:


After a rainy start to the summer, August was beautiful in New England and we took advantage by spending time outdoors, playing tennis, cooking out, and CAMPING. We went for two long weekends of camping in August, once just the two of us and another time with three other couples - friends of Michael's from high school. Both times we went to New Hampshire - it is easy for us to get up there and they have a wonderful state parks system.

First we camped at Pawtuckaway State Park, just east of Manchester New Hampshire. Pawtuckaway was very nice, the sites were secluded and the terrain was varied, making the sites even more interesting and different from one another. Many of the sites are on an island called Horse Island and most of the sites on that island border right up to the lake. The only problems with Pawtuckaway is that they allow motorcraft on the lake! We could hear motorboats cruising around well into the very late night and during the day there are jetskis cruising around. Not exactly relaxing to be on a canoe with jetskis flying past... Also, the beach area was way overcrowded when we checked it out - people were packed in, it looked like a refugee camp! Luckily, the beach was far away from the camp areas and the campsites are for campers only - so it was much quieter. Here is a map of the camp sites:


Here is the view from Site 19... right on the water:


This area was beautiful and we went on a great hike and cooked some good food - pre-marinated steak tips, pasta salad, sandwiches, even bacon-and-eggs for breakfast. When camping, we bring a carton of egg beaters along for a variety of reasons - no broken eggs, no mixing eggs in a bowl, etc. We start the grill up - we have a little propane grill that we use for breakfast and other quick cooking and a charcoal setup that we use for dinner when we're winding down at the end of the day - and get a pan going on the grill with the bacon. On the other side of the grill, we start grilling up our wheat toast. When the bacon is done, we wipe out the pan and then start with a pat of butter. Melt that and in go the egg beaters and a little salt and pepper. Stirring, we add some american cheese at the end. Voila - bacon and cheesy scrambled eggs with toast - perfect camping breakfast.

Pawtuckaway was a preview of our next camping trip to Bear Brook State Park with our friends. We had a great setup at Bear Brook - a much more remote campsite right on two ponds - Beaver Pond and Spruce Pond. The sites are ok, they are somewhat packed together which is surprising given the 10,000 acres (and 40 miles of hiking trails) in this amazing park. The ponds are beautiful and we got some great canoing and fishing in!


We caught mostly perch and some big sunfish - Stacey caught two big perch (8"+) that we ended up bringing back to the campsite in our 5-gallon bucket and scraficing to the camping gods (quickly cutting off their heads). We then gutted and filleted them as best as possible and immediately sauteed up the results in butter, salt and pepper. They were very good! As they say, perch are the tastiest fish in the lake.

Additionally, we had some great steak tips (a camping staple!), bbq chicken, honey chicken, lots of burgers and hot dogs, a few pounds of bacon, lots of sandwiches and cereal and snacks and many, many beers! We ate very well for being "desolate" in the woods...

Michael getting the charcoal going:


Here is the whole group at our communal site, left to right in the back: Jimmy, Brian, Scott, Mike. The girls: Kylene, Sarah, Traci, and Stacey. And in the front, the very well behaved camping mascot/dog, Roxy.


We had a great time throughout August and while we are sad to see it go, we will hold on to our great memories. Autumn is in the air and we are excited to get back to cooking in our kitchen, trying new things on the grill, and taking lots of pics for posts...

Hope you had a great summer too and see you soon.

~Boston Chef

Italian Wedding Soup (or whatever-I-have-in-my-pantry soup)

It's been pretty wet, cold and rainy here in Boston for a little while and with Labor Day upon us, it certainly feels like the end of summer. Although I am sure we'll be getting a few more 80 degree days, probably when I'm stuck at work all day. Figures. Oh and be prepared, my father consulted nature and the almanac and he insists it will be a very cold winter. With that in mind we've had comfort food on the brain. And what's better than a good soup or stew?

Mixed some ground turkey with sage, thyme, salt, pepper, grated parmesan, a little bit of breadcrumbs and some worchestshire. Form into 1 inch balls and brown them up in some oil and then set aside. Meanwhile, in a big soup pot get some chicken stock boiling and add in some chopped onions and celery. If you had fresh carrots, this would be the time to throw them in too, but we didn't. After boiling for 10 minutes, add in the balls of meat, bringing back to a slow boil. Then add in some frozen spinach that has been thawed mostly, and we had some canned sliced carrots which we put in at this point too. Cook about 5 more minutes. Add in some salt, pepper, sage and thyme to taste.

Normally, I prefer small pasta for this dish like a ditalini, but I have yet to find a wheat or multi-grain version, so I broke up some rotini, about 1 cup and put it in. Cook until pasta has cooked through, probably about 15 more minutes. This dish gets a 9 out of 10. Super yummy, it's hard to stop eating it, and it's superb the next day too!

Chicken Curry

One medium we've never ventured into is Indian cooking. As we are trying to branch out and expand our cuilinary toolbox, S decided it was time to attempt a curry - even if it was one in which she just took ideas from lots of different recipes.

Cut chicken up into big chunks and season with salt, and lots of curry powder (oh and a little bit of allspice too!) Brown chicken in some olive oil, and then set aside. Saute some onions, garlic and one sweet potato diced up into half inch cubes. After about 8 minutes add in some chopped portobello mushrooms, add salt, red pepper flakes and some curry powder. After another 5 minutes, add in about 1 cup of chicken stock, add chicken back to pan and simmer until potatoes and chicken are cooked through. Finish by adding a couple splashes of cream, half n half, coconut milk or plain milk -- whatever you have. We used half n half.


I served it over a bed of baby spinach b/c I watch my carbs, but it would've been better over rice, I'm sure. (and M wishes I had too!)


For a first pass, this was pretty good (7 out of 10), but it needed more curry powder even though it smelled like it had plenty, the taste wasn't completely there...or maybe try the curry pastes they have at the market.

Monday, July 31, 2006

Bluefish "Burgers", Grilled Corn on the Cob, and a Tomato Basil Salad

We've been eating alot of fish and shellfish lately - trout, steamers, haddock, and now bluefish! Inspired by our favorite food blog, Helen's Beyond Salmon, and her recipe for "the other burger", we decided to make our own bluefish burgers! Morse Fish Company had some very fresh bluefish for $6.99/lb so we picked up a pound and brought it home. Along with that, we got some fresh corn on the cob and a couple of big, red tomatoes.

Back at home, M pulled the bluefish off of its skin in little chunks until he had shredded the whole thing. Then we mixed in some mayo (maybe 1/4 cup), dijon mustard (couple dollops) and some onions we had previously sauteed and allowed to cool (a medium onion, diced tiny, cooked with a generous pinch of salt). We would have thrown in some cilantro, but alas, we had none...

This made for VERY loose consistancy - not like patties at all, it would go right through your fingers. Undaunted, we scooped up 1/2 the mixture and plopped it onto a sheet in a relatively patty-shaped fashion... then repeated with the other 1/2. This sheet went into the fridge for a couple of hours and it was during this time that it solidified enough to work with.

The corn on the grill we have down pat by now: Peel back - but don't remove - the outer husk and remove the silks. Then fold the husk back up over the corn and use kitchen string to secure. Submerge in a bowl of water for 30 minutes so the husks get wet and the corn plumps up a little and they are ready to go. Hot grill, but careful over direct heat (the husks will burn a little, no problem) for 25 minutes, turning frequently. A little butter and salt and you have perfect corn on the cob!

Back to the bluefish... The only disappointing thing about this recipe was that they were to be pan-fried and not grilled. But we wanted to cook outside! Not to worry, we simply took our little le creuset baking dish and placed it right on the grill - using it as a griddle!

We pulled out the now-somewhat-more-solidified bluefish patties and sprinkled the top side with breadcrumbs. Carefully flipping over, we finished lightly breading the other side and forming these into actual patties - they were perfect consitency by this point.. to our relief!

We put the baking dish-cum-griddle over a medium high heat, carefully added some olive oil, then dropped our bluefish in... cooking them for about 5 minutes per side.

We served them up on a bed of baby spinach with the grilled corn, and a tomato, EVOO and basil salad. Not really burgers - more like patties. They were ABSOLUTELY DELICIOUS!!! Wonderful flavor and texture - we'll definitely be refining this recipe a little and making these again! Thanks, Helen!


Sorry about the pictures, we are trying to use a new old camera and may just have to go digi camera shopping...