We had our Memorial Day BBQ Party (see next entry) but we cooked so much I had to split it into two blog entries! One for all the rest of the food and one for the...
RIBS!!!! Our first attempt ever! The night before, we made a barbeque rub - Kansas City-style - with 1/2 cup brown sugar, 1/4 cup paprika, 1 tbls chili powder, salt, black pepper, garlic powder, onion powder - and a few shakes of cayenne pepper. We rubbed that rub all over our four sections of RIBS - two racks cut in two - and then wrapped each individual 1/2 rack very tightly in plastic wrap. The ribs slept peacefully - unsuspectingly - in the fridge overnight...
RUB IT IN:
The plan for the Ribs on the day of the party was: 1. out of the fridge for 30 minutes, 2. transfered to triple-layered alumninum foil, 3. moistened with 1/4 of a beer poured into the one, last open end, 4. and sealed off tight. Then, the packages met a very low, covered grill (about 325 was the lowest I could get it) for 2.5 hours to simmer and steam in the rub and beer.
After all that time, take them off and let them rest for about 15 minutes. Then, out of the foil packs and back onto the grill for about 8 minutes/side, basting with bbq sauce (store bought - KC Masterpiece) that entire time. Just watch them closely and finish 'em like you want 'em.
SIMMER AND STEAM:
The result? Two of the four packs (the two bigger ends of each of the two racks) came out PERFECT - and the other two were RUINED!!!!! The smaller ones were charred to an unsaveable crisp, while the two bigger ones were perfectly tender and fell right off the bone.
This is just out of the foil, BEFORE I put them back on the grill to finish them with the bbq sauce: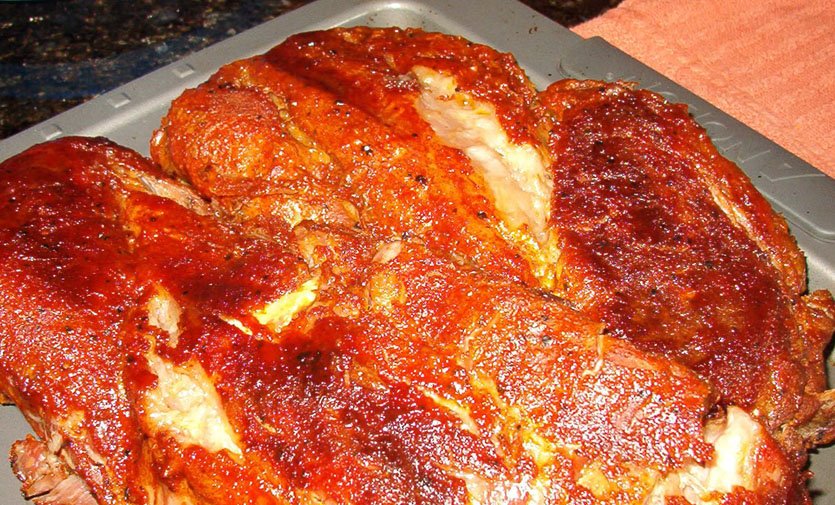
So, it was 50% of a whopping success! These two 1/2 racks came out so delicious - SOOOOO TENDER! - with very subtle flavor from such a seemingly POWERFUL (sweet and spicy) rub... And the SMELLS from the grill all day while it was cooking out back - sweet and delicious!
Next time I will kill the 2nd burner too and just run the one (out of three) on the lowest possible setting. I KNOW we can get these to be competition-level! It is my mission this summer...

Monday, May 29, 2006
RIBS!!!
Friday, May 26, 2006
Grilled Sweet Potatoes, More Chicken, Pizza, and Ribs?
We've been eating... food!
We sliced sweet potatoes in one-inch, three-sided spears and dressed them in olive oil, salt, and pepper and grilled them 10 minutes each on the two non-skinned sides. They came out good and mushy with lots of charring - will do less time and move away from the direct flames next time, but this seems like a good alternative to boiling or roasting.
Still trying to perfect the split breasts on the grill... tried searing the skin side down, then turning and grilling indirectly for about 45 minutes (the temp in the grill maintained about 375)... Too charry on the skin side, wondering if should even put the skin side down? My brother says my dad's secret is to always be turning the food - but that goes against every recommendation I've read that says "don't turn any more than you have to!" I'll have to consult with the big man to get the real scoop.
We tried adding smoke to the chicken by putting an aluminum tray full of soaked hickory chips under the grill racks - that didn't seem to do very much! Perhaps I added too many in a big pile, next time I will try one layer and see if that helps...
Made pizza with that leftover dough from a while back that had been in the freezer. We made a VERY thin crust and made sure that the oven was a very hot 500 degrees this time... came out great with turkey pepperoni and sliced red peppers and mushrooms - no sauteing!
We have lots of summer vacation planned this year, but this weekend - Memorial Day weekend - we have no plans! Except for one plan, of course - to run the grill all weekend long. The weather for Sunday and Monday looks great.
So we wanted to try our very first attempt at ribs. Have been doing lots of research but if anyone out there reading this has any specific RIBS recipes or pointers, please leave them in comments! We are, as always, open to experimentation!
Thanks!
~S & M
Wednesday, May 24, 2006
Our Visitor
We had a visitor stay with us for almost a week - part of the reason we were posting so infrequently. Our nephew, Jackson, came and stayed with us in Boston! He is one year and two months old. He thoroughly enjoyed his visit, even though it rained the whole time.
Jack even got to go up to Maine and visit his Great-Grandmother, along with his Grandparents and Great Aunt and Uncle! We also went to Haverhill, MA later that same day and he got to meet his Dad's cousin and his Dad's cousin's daughter, Jordan! I guess that makes them cousins once removed?
He was very well behaved and a perfect house-guest... We wish the same could be said about his parents!
Here is Jack with his father!
He loves balloons and he was fascinated by our fish tank! 
Bath time...
Jack and Jordan
Stacey has her hands full!!!
Dad reading to Jack and Jordan:
Jack and I sleeping after a long day in the car... We both get cranky without our naps.
Monday, May 22, 2006
A Life-Changing Event
Today we got our grill!!!
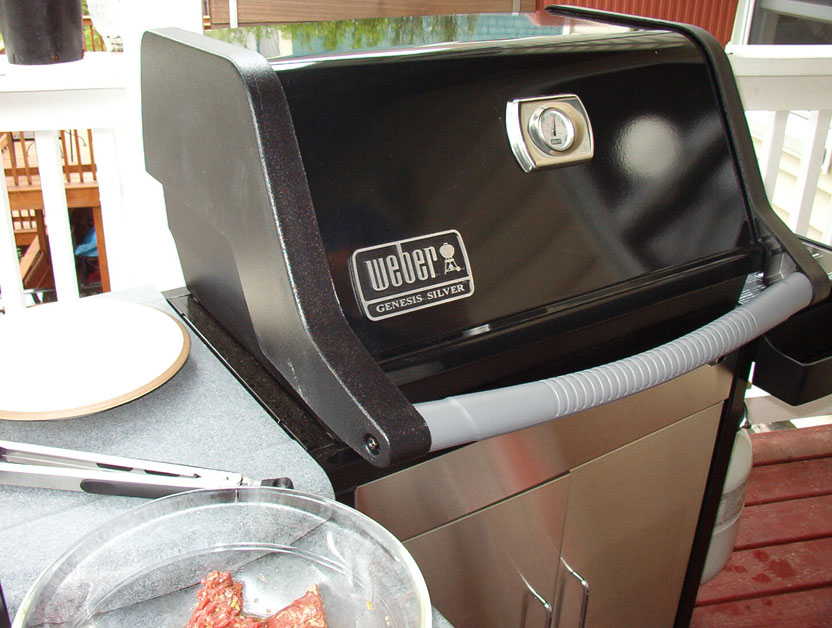
We are looking forward to many years of use from the grill - a Weber Silver Series B. We got right to work by hooking up the tank and checking all the connections for leaks. Everything looking good, we wiped down the enameled cast iron grates, positioned the grill in the spot we wanted, and fired it up. Preheating it with all three burners on high takes about 10 minutes to get the grill to temperature - 600 degrees.
We immediately dove in with some Sirloin Steak Tips that had sat in worcestershire, steak seasoning, and water for 30 minutes. About 15 minutes total cooking time, turning to get all sides. We enjoyed these tender tips with chips and a cut up cuke for lunch, and plotted our night's sacrifice to the grill gods...
For our first evening with our new baby, we wanted to go big. We trimmed the fat off of a sampler pack of chicken pieces - two split breasts, three drumsticks, and three thighs - and put them in a freezer bag with a quick marinade of worcestershire, balsamic vinegar, olive oil, hot sauce, salt, pepper, and garlic/onion powder and let them sit in the fridge for about an hour.
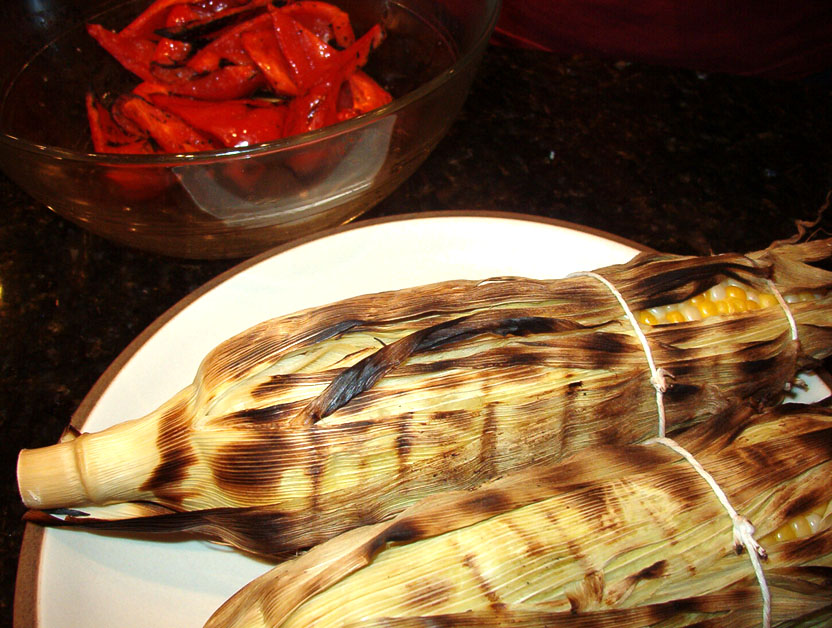
We peeled back the husks from two corns on the cobs and removed the silks, then put the husks back up and secured them with some kitchen string. We soaked those in cold water for an hour. We also cut up some red pepper into big chunks and let them sit in olive oil, salt, and pepper.
Preheated all three burners on high again (this is S.O.P.) then we turned all the burners down to medium, we put the chicken skin side down right down the center of the grill (horizontially). We let the skin side get a sear for a couple minutes, then flipped them over in their spot and turned off the center burner. This will allow for indirect cooking, having the front and back burners heating the grill cook the chicken without direct heat from below.
After 10 minutes, we added the corn to the medium direct heat in the back. Looking for 30 minutes for the corn, turning every 10 minutes.
With 15 minutes to go, we added the red peppers.

The drums came off first, then the thighs, corn and peppers and we were ready to eat. The breasts took a little longer - they'll be for leftovers after the GYM the next night.
Everything came out delicious! The peppers were wonderfully roasted - will definitely try charring whole peppers over high heat. The chicken was fantastic, perfectly cooked - we usually brine chicken pieces but didn't have the time, can't wait to try that. The corn was great, too - very SWEET! Maybe a few more minutes for the corn next time.
All-in-all, what a wonderful day - Banana pancakes with eggs and bacon for breakfast, tips and chips for lunch, and grilled chicken and corn for dinner!
THANKS to those that helped us buy this grill, we still had some Home Depot house-warming gift cards from friends and family. We had to buy the grill, the cover, the tank, fill the tank, and rent a Home Depot van to get it home... but with the gift certs, 10% off by opening a credit card (which is 0% APR for this purchase and will immediately be paid off and never used again), and a $50 gift card rebate, we were very happy with the cash out-of-pocket that we spent.
Looking forward to lots of experiments with the grill and really working to get the best flavor out of it by cooking on it ALL THE TIME!
Here's to many days of cooking outdoors this summer!
Love,
Stacey and Michael
Sunday, May 21, 2006
Banana Pancakes
Which brings us to pancakes! Its breakfast! Its sweet! Its baking (kindof)! Its delicious! WE WERE CRAVING THEM LIKE THE WORLD WAS ENDING! Let's give in to temptation this time.
Of course, we try to avoid just eat a bunch of all-purpose flour with sugary syrup on top. Is there a way to add volume AND some sweet flavor to pancakes? Indeed, bananas can do what we need! We mashed up the very ripe bananas with a fork to add structure to the batter - filling in for some of the flour. The banana, once cooked, also provides some sweet flavor.
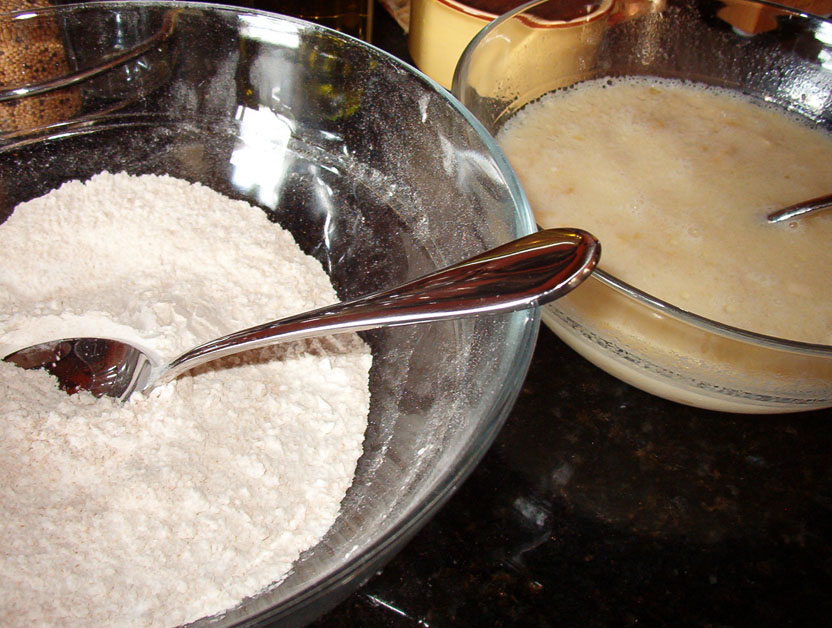
1/2 cup all purpose flour and 1/2 cup wheat flour, 1 tbls baking powder, 1 tbls sugar, and a pinch of kosher salt on the dry side. Two mashed bananas, a cup of milk (our house milk is 1% - yours?), 2 tbls canola oil, and 1 beaten egg on the wet side.
Stir these two together until just combined. Then, onto a heated and buttered pan and about 5 minutes on each side. This ended up making nine 3-4" pancakes. We like ours with a couple over easy!

A little maple syrup and some microwaved bacon (it works - one minute/slice on a plate covered with a paper towel, then taken out and patted dry by another paper towel).
Before and After:


Wednesday, May 17, 2006
Fiddleheads!
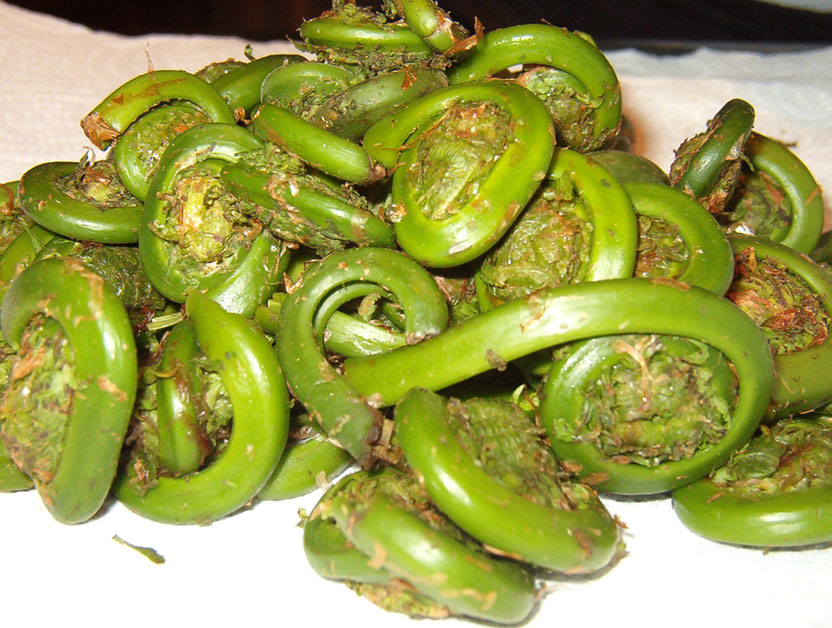

Ah, fiddleheads. Boy, do they bring me back to my childhood! Growing up in Northern Maine gave me major moose and potato overexposure, but it also opened my eyes to this once a year yumminess. My mother, aunt and I used to comb the steep banks of a little shaded brook each spring to fill a shopping bag for our own use. We were not fiddlehead foragers for money, as are many people. Cultivating fiddleheads is problematic so most often (maybe always), the fids you find in the store or in a jar were picked by foragers. I believe there is only one company in the U.S. (WS Wells & Sons cannery in Wilton, ME) that cans these delicious ferns.
Fiddleheads are baby Ostrich ferns that are still coiled. In my opinion, their flavor is reminiscent of asparagus with a hint of earthy mushrooms. They may appear in your local supermarket in late April and May, and run between $3.99 to $8.99/lb b/c they are so hard to find. You’ll notice that they have brown scales (paper-like covering) throughout the coil…no worries, follow the recipe below and you’ll be all set!
(Note: the picture above is of still-raw fiddleheads.)
Trim the stalk side of the fiddlehead to remove any hardened, browned edge. Soak them in water for a few minutes and rinse to remove some scales. Blanch the fids for a minute or 2 and drain. You’ll notice more scales coming off. Boil them again for another 10-15 minutes, drain and serve warm with butter, salt and pepper, yum!!! You can always sautee them up with pasta or whatever, just make sure they are cooked through by boiling first as there may be unknown toxins the are active when raw.
From TheHeartofNewEngland.com (see link below):
...the Center for Disease Control has found a number of outbreaks of food-borne illness associated with fiddleheads (nothing is simple, right?) But the outbreaks occurred when the ferns were eaten raw or lightly cooked (as in sautéed, parboiled or micro-waved). So…cook your fiddlehead thoroughly before eating them…boil them for at least 10 minutes. After than, you can eat them right away, or freeze or pickle them.
Delicious AND dangerous! We had our fiddleheads, prepared as described above, with our Shepherd's pie. They are so wonderfully tender and flavorful and a real rite of spring in New England - take advantage while they are available during these first months of spring and summer!
More Fiddlehead Information
Heart of New England Fiddlehead Info and Two Recipes
Maine Fiddlehead Recipes
Shepherd's Pie
- Cut two large sweet potatoes into 2" chunks and boil until tender, about 15 minutes.
- Drain and mash with butter, salt, and a little milk to make mashed potatoes. Set aside.
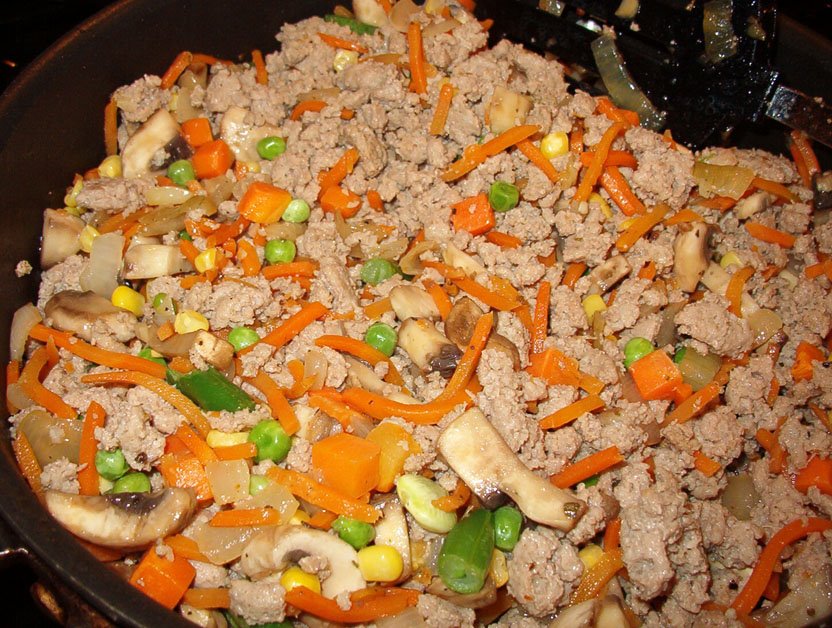
- Brown 1.3 lbs of ground turkey. Drain and remove and wipe out pan with paper towel.
- Cut up 1 medium yellow onion and begin sauteing. After three minutes, add two garlic cloves, finely chopped.
- Add sliced mushrooms and eason veggie mixture with salt, pepper, and sage.
- After another minute add shredded carrots and frozen mixed veggies (corn, peas, lima beans).
- Add the turkey back in and combine.
- Add 1/2 can of cream of mushroom soup.
- Spoon mixture into a 9x11" baking dish.
- Top evenly with mashed potatoes.
- Spread some shredded cheddar cheese on the top (optional).
- Bake in preheated 375-degree oven for 30 minutes.
- Remove and let cool for a couple minutes.
- Eat.


Tuesday, May 09, 2006
Pasta Puttanesca
Is our Pasta Puttanesca the real thing? Maybe not, based on some of the recipes we've found online... Truthfully, however, our version sounds better because we make it with chicken and fresh (not canned) tomatoes. Unlike a deep, long-simmered pasta sauce (which we love, but...), our puttanesca recipe is a quick and fresh-tasting version of this famous "whore's pasta". From Wikipedia:
Fun! What's better than a dish with a spotty history?The name originated in Naples after the local women of easy virtue. Puttana means "lady of the night" (i.e. a prostitute), but the reason why the dish gained such a name is debated. One possibility is that the name is a reference to the sauce's hot, spicy flavor and smell. Another is that the dish was offered to prospective customers at a low price to entice them into a house of ill repute. According to chef Jeff Smith of the Frugal Gourmet, its name came from the fact that it was a quick cheap meal that prostitutes could prepare between customers.
Our version of puttanesca goes down very quickly - we don't start with the sauce until we drop the pasta (whole wheat penne) into the boiling water. The whole dish takes 12 minutes from the time the pasta goes in, so quick is an apt description. Because it all happens so fast, we like to sous everything up before hand:
- Chicken breasts cut into big-bite-size-ish pieces
- Flour seasoned with black pepper, kosher salt, and a little onion/garlic powder
- Five big plum tomatoes seeded and chopped into nice-sized chunks
- A bunch of Spanish/pimento-stuffed olives (a few handfulls, maybe a little less than a cup) roughly chopped
- A few tablespoons of drained capers
- Anchovy paste - in a tube
- Two lemons cut in half - for juice
- Parmesan cheese - in the green can or fresh grated, if you're cool like that
Water boiling, penne goes in and the timer is set for seven minutes. Chicken chunks get dredged in the seasoned flour - just a very light coating - and then added to a hot pan with olive oil in it. Brown the pieces on the first side (3-4 minutes), then turn over. Squeeze one of those lemon half's worth of juice on there and continue to cook a few minutes. Then add the chopped olives and capers and a couple squirts of anchovy paste - whatever your tastes are - and a couple more squeezes of lemon juice and mix that together. After another minute, add the tomatoes, salt and pepper, and any more lemon juice to taste - and stir to combine.
At this point, the pasta should be done and drained. After two minutes, we're ready to add the pasta and a generous amount of parmesan cheese. Fold all of this together and serve hot!
We LOVE the very briney anchovy-and-olive-and-caper flavor of this dish... some people don't, however, and you can easily modify this recipe to your taste. Instead of the capers and anchovy paste, add fresh basil (at the end, with the tomotoes) and mushrooms. Or spinach. Regardless, you'll have a fresh-tasting chicken pasta dish that produces, yup... GREAT LEFTOVERS!
Grazie,
Il Chef De Boston
Monday, May 08, 2006
Grilling
Thursday night we pulled one of our 1-lb packs of sirloin steak tips out of the freezer to thaw overnight, knowing we'd be ready to enjoy the back deck in the evening on Cinco de Mayo (we used to go out all the time... what happened to us!?).
We ended up being sidetracked by our lovely neighbors ("Michael! Come over for a beer!" he yelled across the street), sitting on their front porch enjoying the evening sun and describing to our lawyer-neighbor the details of the recent murder trial on which BC#1 was a juror. She was very impressed by our legal terminology and gun knowledge ("do you shoot?").
So we were a little late grilling, but we still fired up the steak tips. Marinated in a quick mixture of salt, pepper, garlic powder, fresh-ground fennel, and soy sauce (and some cold water, of course - my new trick!), these had a nice, sweet flavor. Fired up the camper grill (still haven't bought our legit grill!) and these were done in 15 minutes. We enjoyed these grilled tips with a big salad made up of every vegetable we had in the house.
On a side note - are "steak tips" just a New England thing? My buddy who moved to Boulder, Colorado says he misses steak tips most of all... I guess it is a cut that is only around the Northeast. Whatever, good for us! It is my favorite cut - easy, just the right amount of marbled fat, not overly expensive, and delicious.
On Saturday we traveled down to BC#2's Dad's house on Cape Cod for lunch (and to do some basement rummaging for accoutrements and artwork to hang on the walls in our still-somewhat-new house) and his grill was hot the minute we walked through the door. Dad had asked "hot dogs ok with you guys?" the day before - I think he thinks we are flaky dieters who would poo-poo hot dogs. On the contrary, Big Papa Smurf, we love the occasional dog! Dad had those huge Pearl hot dogs grilled up in no time, BC#2 scarfed down two to BC#1's one... And we got some artwork for our walls out of the visit, what a deal!
While there we checked out a Consumer Reports comparison of gas grills - they rated the Weber Silver B (the one we were eyeing) lower than some less expensive models, including a Char-Broil one that was 1/2 the price. Hmmmm...
We arrived back Saturday in the late afternoon, and realized we had no food in the house for dinner. It was still so nice out that BC#1 ran out to the store to grab just what we'd need to grill some burgers for dinner (we really ate well this weekend, no? To the gym!). She came back with burger meat, lettuce, tomato, red onion, some whole-wheat buns, and a pint of tequila. Hello? We ended up celebrating Cinco de Mayo a day late (Seises de Mayo?) with a couple of Margaritas while watching the Kentucky Derby (Mint Julep, Margarita, whatever!) and firing up the grill. These burgers got the standard seasoning (salt and pepper, ground/dried onion and garlic, and a little ground fennel, a splash of water and a massage)... then, onto the grill!
The number 8 horse came in, just like ONE of us had predicted, and we ate our burgers and watched the Red Sox game (a 9-3 win over Baltimore) and had another margarita.
Sunday was all chores, all the time... but it was still a very nice weekend of food cooked outdoors. Looking forward for even better weather to come and for that big, new grill to show up on my deck...
Saturday, May 06, 2006
Turkey Meatloaf
We use ground turkey as much as - if not more than - we use ground beef. Any recipe that would normally call for ground beef, the majority of the time we make the same recipe but with ground turkey (and make sure any cooking time/temperature/doneness differences are accounted for). I don't even remember WHY ground turkey might be better for you (heart-wise? weight-wise? both?) but after a few years of substituting, we're used to it.
We have this old recipe for "Juicy Meatloaf" that we've been using for many years now - and it, indeed, produces JUICY meatloaf. Juicy is good when it comes to meatloaf, and this recipe is certainly juicy. So, the juicy part is taken care of - the rest is up to you.
One of the great wedding gifts we received was a mini-prep food processor. This thing is great for the majority of jobs you want to do in a food processor - but on a smaller scale. The mini-prep takes up no counter space and it is much easier to clean up after. You know how sometimes you're reluctant to use something or do a certain technique because of the clean up involved? Not with this one...
So quartered a big onion, opened a can of carrots (that's all we had, unfortunately... use real, live carrots preferably), and peeled a couple garlic cloves, threw them all in, and pulsed them until they were very finely chopped:
We took four pieces of wheat bread and shredded 'em (shredded 'em good!) and poured enough milk to get 'em moist, stirred 'em around, and turned our attention elsewhere...
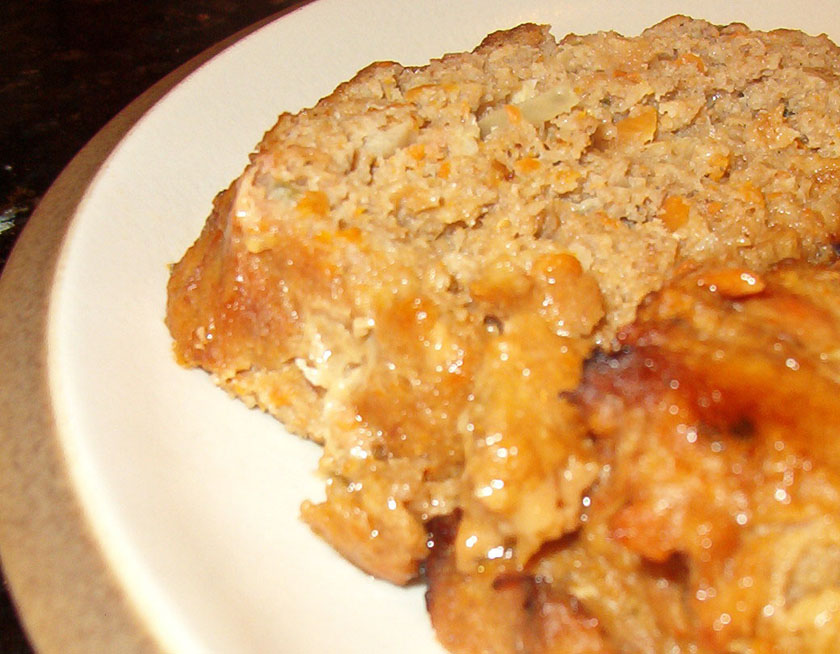
To our 1.3lbs of ground turkey, we added the pulsed veggies, a tbls of dijon mustard, a few generous shakes of soy sauce, one slightly beaten egg (that egg had it coming!), the soaked bread, a good handful of grated parm, dried sage, and some ground black pepper. Knead that together and you will get a very moist meat mixture... it will feel overly moist. If it is too unruly (can't hold a shape at all) add some bread crumbs a little at a time until you get some structure. Don't over-do the bread crumbs though, you want it to JUST be able to hold a shape on it's own.
Put that in a loaf pan that's been sprayed with pam or whatever and put it in a 370-degree oven for an hour or until the loaf is 170-degrees in the middle and the juices run clear. Juicy and delicious! And like most things, even better as leftovers. We had this with a cuke-and-tomato salad and (surprise!) some roasted sweet potatoes.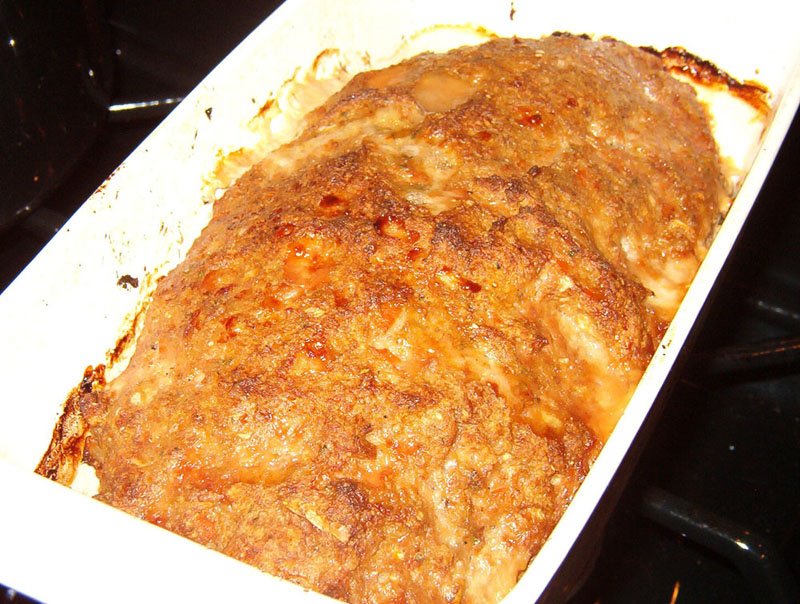
Wednesday, May 03, 2006
Ratatouille with Grilled Chicken
Annnnnd... WE'RE BACK!
Today, yesterday, and the day before that, it has been raining in Boston. The baseball game was rained out, the grass and trees and flowers are getting much-needed (but still very gloomy) water. Should be looking up for the weekend, which is what counts. And this past weekend, it was warm and dry enough to once again fire up the ghetto-grill (our camping grill, being used until we buy a real one) and make some grilled chicken pieces.
Let's go to Boston Chef #2 for the chicken, before heading to BC#1 for the Ratatouille... We had a sampler pack of three thighs, three drums, and three wings that I brined for a couple hours before taking out, rinsing, and putting back in the fridge for another 1/2 hour for it to rest and relax (tough life, chicken pieces)... A gentle salt, pepper, paprika seasoning to the outside and they went onto a high grill for about 4 minutes/side before turning the heat to low and covering for another 15 minutes or so. Lots of flare-ups from the fat, but leaving the cover on pretty much contained them, cut down cooking time, AND gave the chicken great flavor.
Now over to Boston Chef #1 with the Ratatouille... By complete chance, we had all the ingredients for a veggie dish that I’ve been wanting to try out for quite some time – Ratatouille. Since the other Boston Chef was in heaven because he finally had a chance to grill up some chicken outside, it was on me to prepare the accompanying dish inside. The stars were aligned that day, my friends, for I found an eggplant in the back of the refrigerator. I bought it on a whim a few days earlier with nothing in mind and I had forgotten about it until now. Low and behold I also had zucchini on hand... looks like ratatouille tonight!
All veggies are cut up into 1 inch chunks: medium eggplant, 2 small zucchinis, 1 large onion, 5 plum tomatoes. (I would have thrown in a green or red pepper if I’d had one.) Toss the veggies with some olive oil, 2 tbs tomato sauce, fresh thyme from the back porch, garlic powder, salt & pepper. We cooked this French Provencal casserole in enameled cast iron dish at 400-425F for about 45 minutes, stirring every 15 minutes. Sprinkled with a little parmesan cheese before serving. It was better than I expected and definitely will cook this up when entertaining!
Before cooking: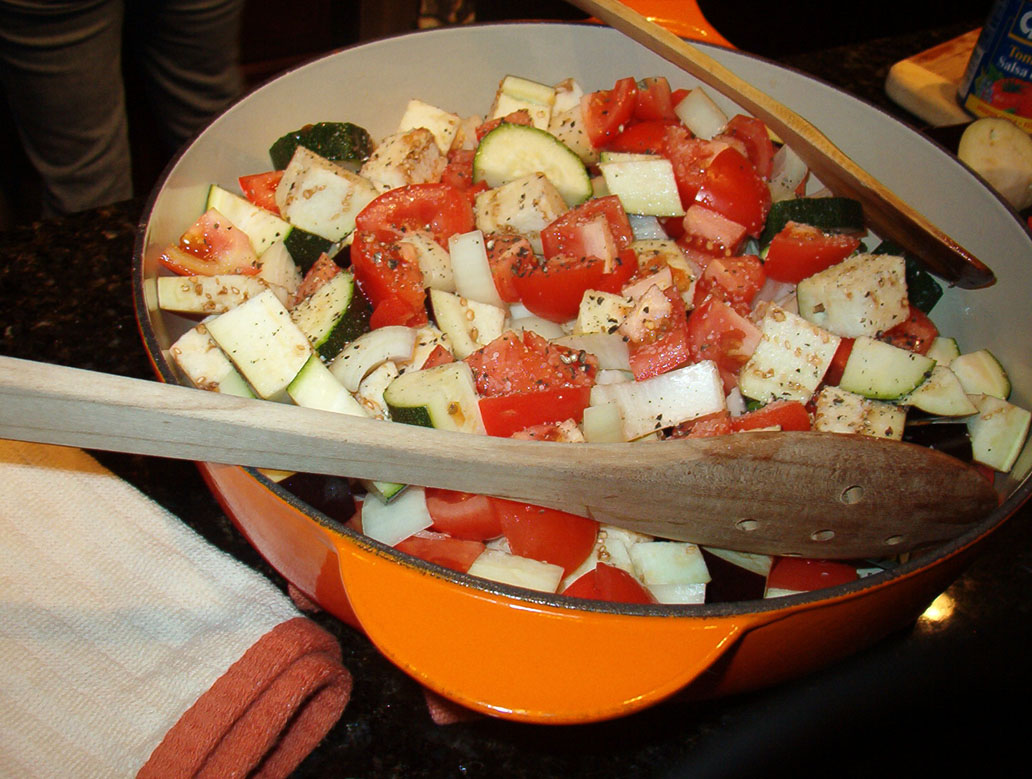
And after, with the chicken... LETS EAT!