Showing posts with label tomatoes. Show all posts

Sunday, May 04, 2008

Stuffed Green Peppers

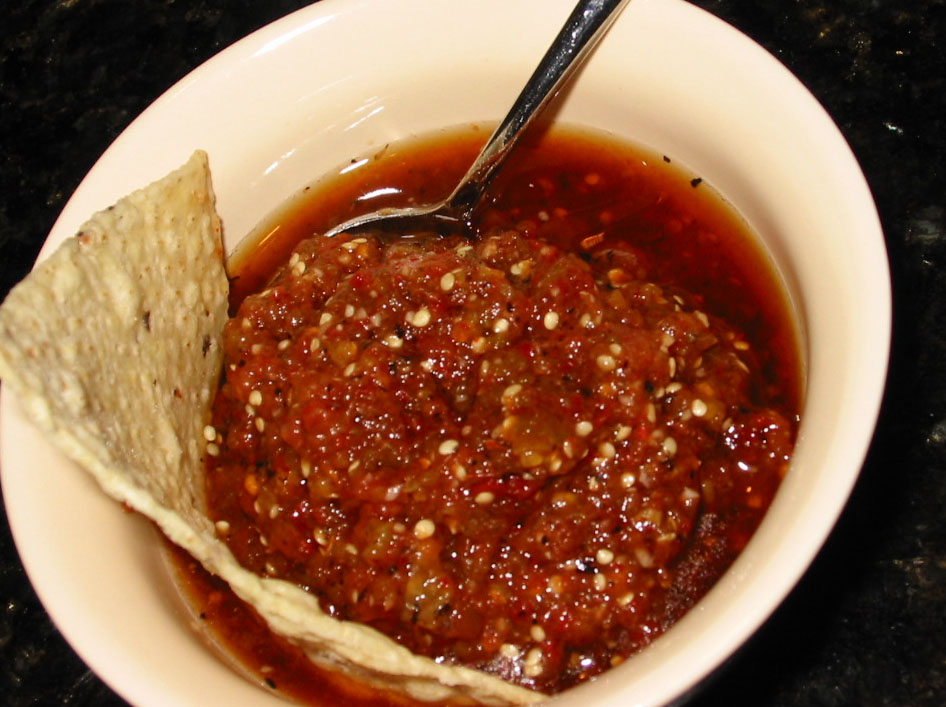
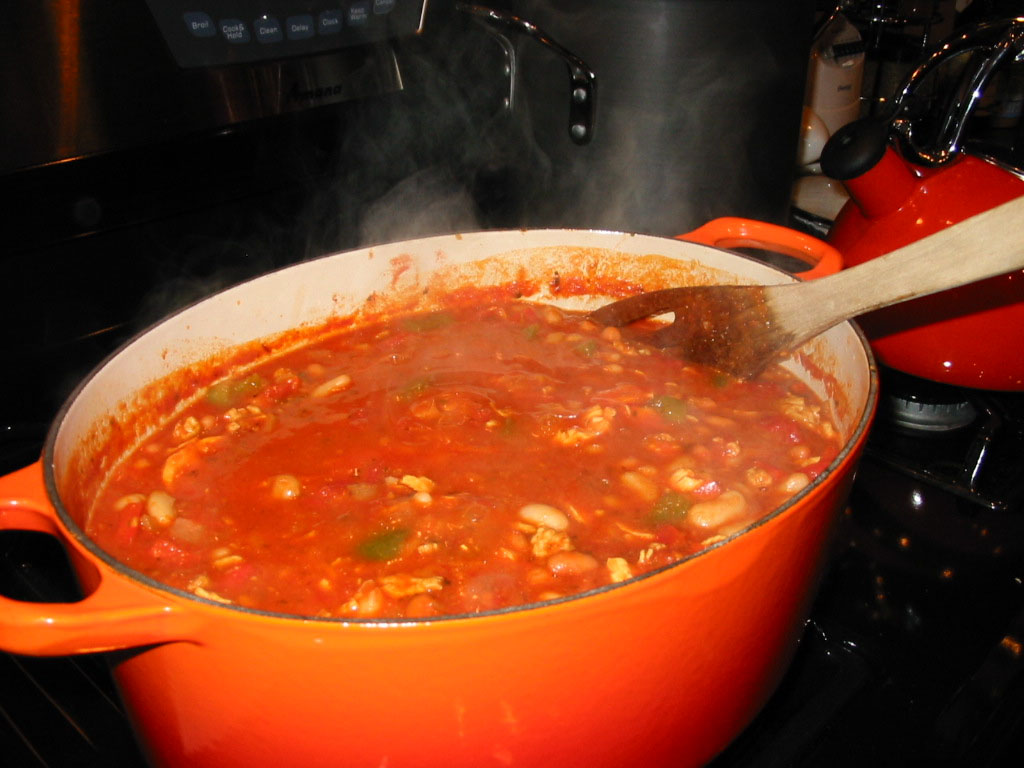
We really can't believe that we haven't posted this recipe before - as we have made it many times! It all stems from a dish my Mom used to make that involved chopped up peppers and onions with ground beef, rice and a tomato sauce. We do like to stuff food, especially when you can eat the container it's served in! In the past we've stuffed acorn squash, chicken, pork chops - among other things - and tonight we shall stuff green bell peppers.


I must admit, I kinda cheated with this time because I did not make the rice part from scratch. Instead I used a box and a half of Rice-a-Roni Whole Grain Spanish Rice which saved time and tasted pretty good! So as this takes roughly 25 minutes, I started this first.

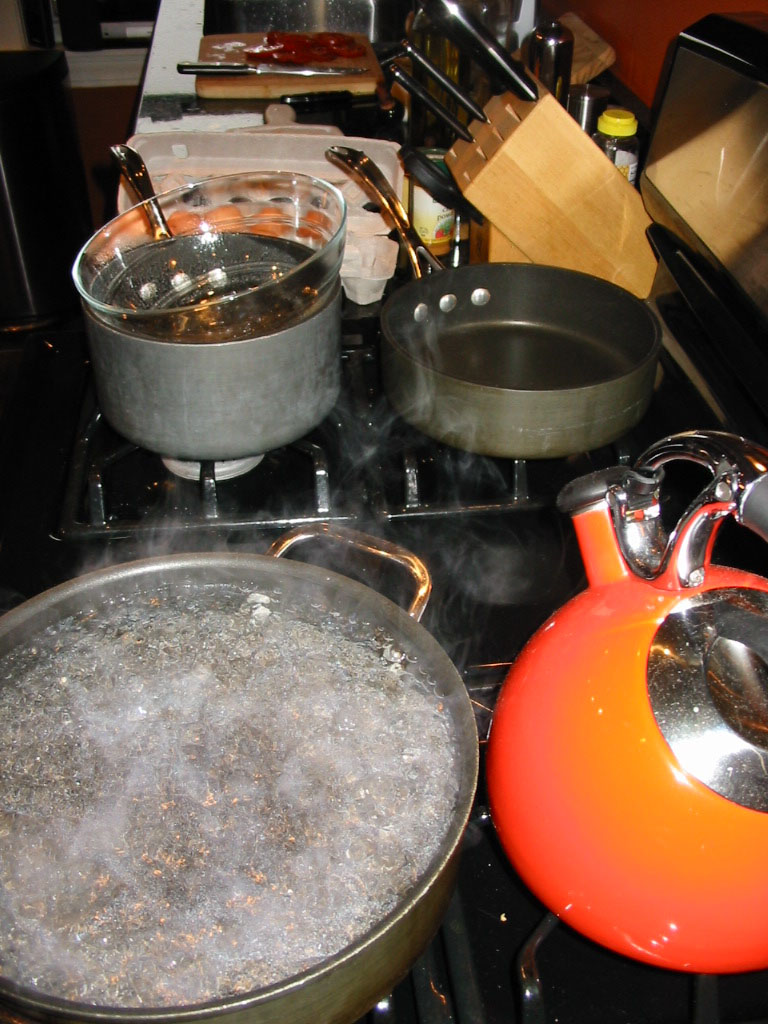
In another large pot, I brought some water up to boil in order to parboil our green peppers, from which I removed the tops and the inner membranes and seeds. Boil 4 peppers for 5-10 minutes until they are just fork tender, but not overcooked.

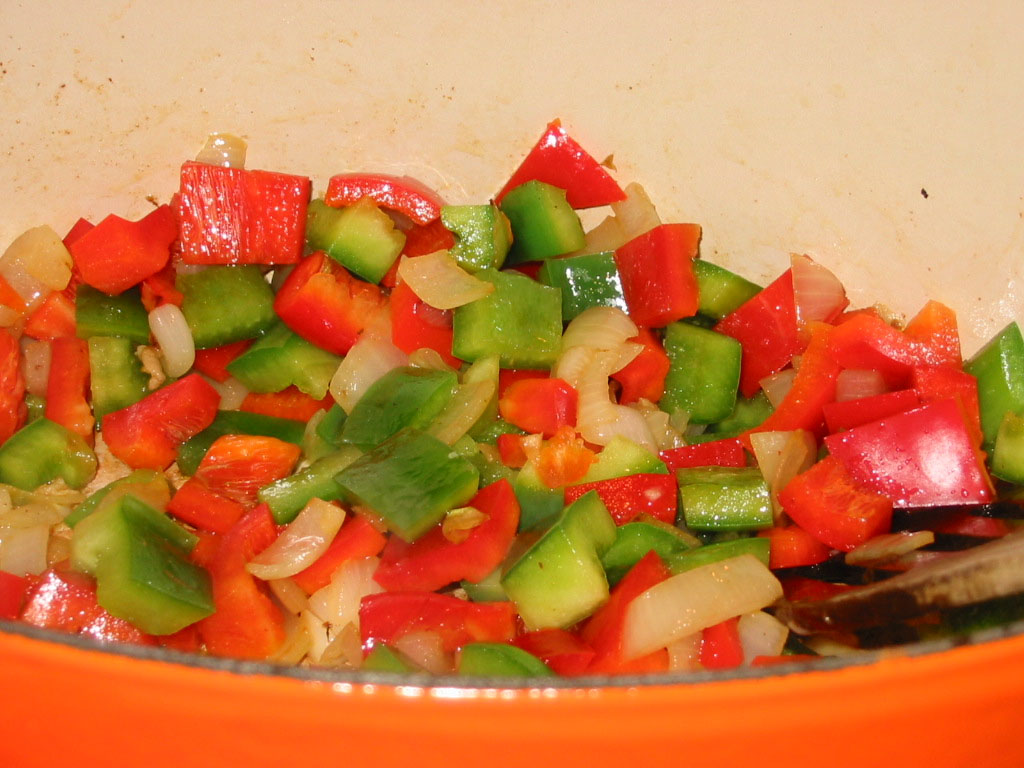
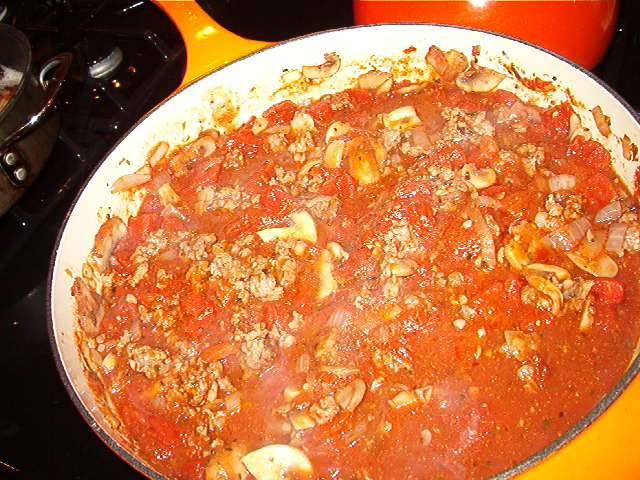
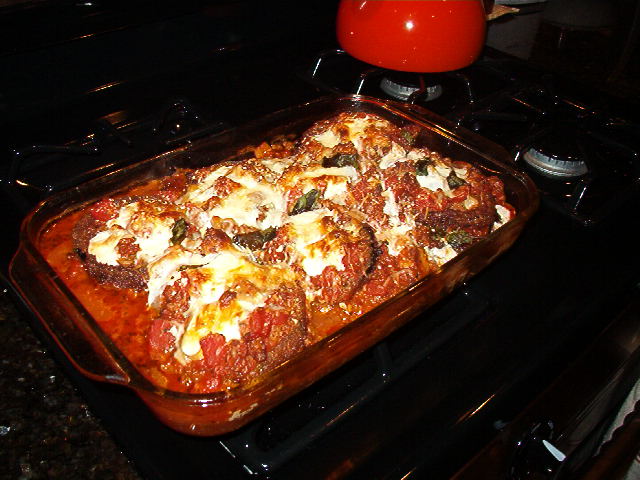
While all this was happening (many burners needed although if you are well prepared, trust me, it's not too chaotic!), I browned 1.25lbs ground turkey. After browned, I removed and began to sweat 1 medium diced onion over lowish heat for about 10 minutes. Then I added 15oz petite diced tomatoes and 8-16oz of tomato sauce depending on your tomato-y preferences. The turkey was added back along with a pinch of saffron, 1/2tbsp cumin, 1 tsp garlic powder (I had forgotten the fresh stuff), and 1 tsp Mexican oregano. Now I had made 2 boxes worth of the rice, but only added about 75% of what I had made... it just depends on how ricey you want this dish. After a stir, I gave it a taste and added salt and pepper to my liking.
Spoon the mixture into the peppers which are now in a 9 x 13" baking dish. Top it off with some shredded cheese and put into a 400 degree oven for 15-20 minutes or until the cheese is starting to brown. Another option is to put chunks of cheese into the turkey rice mixture when you've taken it off the heat before spooning into the peppers... this way you'll have cheesey goodness all thoughout the pepper.

Saturday, January 19, 2008

Roasted Red Pepper & Tomato Soup

Let's hear it for another installment of blended soups!! As you know, we're trying to hit all the colors of the rainbow, and red was on our list today! The intent for the soup was for the peppers to have the starring role, but I added one too many tomatoes to the pot! And these San Marzano plum tomatoes have such a wonderful intense flavor that it masked some of that bell pepper taste. With that being said, it was still a pretty kick butt soup!

As with all my soups, I started out sweating 1 diced onion, 3 sliced carrots and 3 ribs of celery in some olive oil and 2 tbsp butter. Let that sweat over lowish heat for 15 minutes, then add a few cloves of minced garlic. I had intended on roasting fresh red peppers, but they didn't look so hot at the store, but I lucked out in finding a 32oz jar of fire-roasted red peppers which looked better, were already roasted and were no more expensive than the fresh ones. I roughly chopped up those and into the pot they went. I opened up a 32 oz can of those wonderful San Marzano tomatoes, and put in about 2/3 the can with juice. Trust me, the soup was great, but perhaps only add 1/4 to 1/3 the can if you want the peppers to shine.


After a few minutes warming through, I added chicken stock to the top of the veggies, some S&P and a few tsp dried basil. That's it! Let it simmer for 15 minutes until all veggies are soft, reseason if necessary, and perhaps add a bit of butter to smooth out the flavor. Blend away and of course add more stock if it's too thick!


Check RED off my list!

Saturday, September 08, 2007

Yellow Tomato Salsa over Grilled Chicken


Along with the tons of cucumbers my parents gave us from their northern Maine garden, they also gave us 10 smallish green tomatoes. We asked them what kind they were, but they couldn't remember the exact name other than they've planted them before -- or had they!?!?! When they started to turn yellowish, we started drooling --every day we would watch them, but they weren't turning red! What was going on?? One started getting soft too, so I gave Mom a call to find out what was up! Did they not like being in Boston? Nope, Mom said, I think your father bought yellow tomato plants by mistake! Well, that gave us the go ahead, and boy were they delish. In this dish they remind me of mango or yellow pepper b/c for us, it is rare to have a yellow tomato! This was a very simple Friday night meal, but it was full of flavor!


For the salsa, I chunked up 2 yellow tomatoes, 1 avocado and a quarter of a red onion. Some salt and pepper and the juice of 2 limes, et voila that's it! M brined some chicken breast earlier in the day, and topped them with some Penzey's Cajun Seasoning. Grilled to perfection with a side of couscous and topped off with the yellow tomato salsa, a great summer night meal!

Friday, August 24, 2007

Tomato!


If you plant it... suprisingly it will grow, albeit at an extremely slow pace. We planted a brandywine tomato plant in a 5 gallon bucket and set her on our back deck – plenty of sun. The plant itself grew extremely fast - and to huge proportion - with plenty of flowers and big, sticky leaves. But then the flowers died off soon after and nothing happened. So we waited... And waited. We wondered if we would ever see a tomato – what could we be doing wrong? Perhaps it was the fairly mild summer we were having in Boston – although one day it could be 65 degrees, and the next 90, so perhaps it was the temperature swings that we stunting our pretty little tomato plant.

Then suddenly, there was one tiny little green tomato making its way into the world. It took maybe 2 weeks for it to get up to size and then another 1.5 weeks for it to ripen on the vine. We took it off and let it ripen a bit more on the kitchen counter. And then last night, we could wait no longer. Whatever we were having with dinner, we were going to have a tomato to go along with it!


Obviously, the star of the show is Brandywine herself with a touch of kosher salt. Her backup singers were Miss Parmesan Couscous and Mr. Oregano-tarragon Chicken Thighs who happened to be lounging in a red wine mushroom sauce. The dinner was magnificent! We can only wait for the other little green tomatoes to come up – they seem to all be growing faster than our first!

Monday, August 06, 2007

Grilled Eggplant with Basil Tomato Salad


Our basil is out of control this year - which we really don’t mind, but we are always having to find new ways of using it! We were trying to come up with a twist on a Caprese Salad, and we think this did the trick...

We started out by making the salad so that it had at least 30 minutes to chill out in the fridge. Diced 2 medium tomatoes, added 1 16oz can of garbanzo beans, a couple tbsp capers, the juice of 1 lemon, some salt, white pepper, olive oil and a splash of red wine vinegar. Then, out to the deck to harvest about 12 BIG basil leaves which I chopped up and added to my salad. Into the fridge for at least 30 minutes, but the longer the better!

Now on to the base of this dish. We sliced 1 medium eggplant into half inch thick rounds and brushed those rounds with olive oil, and just put some salt on for seasoning. We grilled the eggplant over medium heat for about 5 minutes per side. At the last moment, I placed some sliced fresh mozzarella onto each eggplant round just to get it melting slightly... then off the grill.

A scoop of the tomato salad onto the eggplant and mozz finishes this super simple and yummy sidedish. Personally, I don’t eat the skin of the eggplant, but I keep it on while grilling to hold it together. It’s easy to remove after you have it on your plate - the eggplant "meat" comes right out!

Now we're trying to find ideas for the next basil recipe!

Wednesday, August 01, 2007

Mojitos... and Fish Tacos


Summertime is in full swing... how about a delicious, refreshing beverage and a light, coastal meal?

I really do love the concept of fresh herbs in drinks... whether you make lemonade with some lemon thyme in it, or perhaps a basil bloody mary martini. This time for me it was the mojito that was calling my name. I really didn’t want to use all that sugar in my drink though since I’m supposed to be following somewhat of a low-carb diet right now. So I just used Splenda instead, and I was quite happy with the results. 1 teaspoon of Splenda, 2 wedges of limes and several mint leaves (more than you think) into a glass which I quasi-muddled with a wooden spoon. I then added ice, some Bacardi and a few splashes of raspberry lime club soda (that’s all I had). It came out refreshing, light and truly summery!


After that, we went for an EASY fish taco salad. Last time we had fish tacos, we included tortillas and beans - this time we decided to go REALLY light and just go with fish and veggies. We marinated a fresh fillet of cod in white wine, lemon pepper seasoning (which includes lemon zest, pepper, salt), and chives for ~30 minutes... then added the fish to a hot grill pan. Maybe 3 minutes on side A, then flipped and after 2 more minutes on side B we were ready to go.

A bed of iceberg lettuce, chopped very ripe tomatoes, and sliced black olives... a couple of BIG chunks of that delicious cod... and top it with our fish taco sauce: 1/2 tartar sauce mixed with 1/2 medium taco sauce.

Delicious! Happy Summer!


Wednesday, June 13, 2007

Twin Grilled Whole Chickens


Exactly like the title says - twin whole chickens, roasted on the grill. Why not? We try to avoid running the oven for long periods of time during the summer, so we're grilling everything. This time, we wanted to make something that would stretch a few nights (and would be inexpensive, as well) so we spotted these twin-packs of ~4.5lb chickens on sale for $.99/pound! SOLD!

We determined right away that we'd try roasting them whole on the grill at the same time, using the outer burners to maintain the 350-degree temp and leaving the middle burner - over which the chickens would sit - turned off. Like most grills, ours has a thermometer that we'd be monitoring closely and adjusting those burners accordingly. Other than that, we'd treat it just like any other roasted chicken.

So.... we brined them overnight in a solution of water, salt, sugar, bay leaves, spices, hot sauce, and soy sauce. About an hour before they were to meet the grill, we took them out and rinsed them down and threw them back in the fridge. Shortly after, we went out to preheat the grill and grabbed a bunch of fresh herbs from the back deck - basil, tarragon, rosemary, lavender, and oregano are all growing happily out there.


Finally ready to go, we melted some butter and pulled the chickens out. Salt and pepper the inside and stuffed a big handful of herbs in each, then tied the legs together. Brushed on some melted butter on the outside and added the final spices - salt and pepper and smoked paprika - to the outer skin.

Grill at about 400, we popped the two chickens on (can't believe we didn't take pics of them on the grill! next time..) and shut that grill up. We could hear the skin popping and crackling as soon as they hit the hot grates! The temperature immediatly dropped to about 360, so we let that go. At about 4.5 lbs each, we'd be looking at 1.5 hours but we'd start checking the temp at 1 hour.

An hour later we opened the cover for the first time and they were happily cooking away! Took the temp and it seemed that we'd be on schedule for that 1.5 hours... sure enough, a half-hour later, all temp readings came back "ready" and the twins came off to sit under some foil for a resting period.

The chicken came out wonderfully... perfectly cooked, not uneven at all, some grilled flavor but not overly smokey, just juicy and flavorful! To accompany our twin birds (we only ate part of one, and have lots leftover!) we made a ratatouille with eggplant, tomatoes, onions, green pepper, tossed with some olive oil, dried thyme and basil, salt and pepper - and roasted that in a 400-degree oven for ~45 minutes. Delicious!

Monday, May 21, 2007

Chicken Enchiladas with Cuke and Corn Salsa


Same delicious Enchilada with Mole Sauce and Cuke and Corn Salsa recipe that we made last month - with the same delicious results - but this time we ended up playing around with our new camera with video and our video editing software!

So, without further ado... our premiere Boston Chef video!

Sunday, May 20, 2007

Roasted Summer Squash with Tomatoes


I love those quick and easy sidedishes that take maybe 5 minutes to prep, and then all you do is pop it in the oven and forget about it. M was grilling on the deck, so after I put this dish in the oven, I could join him and enjoy the sites and smells of spring with a glass of chardonnay.

I sliced up 3 good sized summer squash into half moons, and threw those into a baking dish along with 3 diced plum tomatoes, a couple cloves of chopped garlic, a handful of chopped parsley (if I would have had fresh thyme, that would have been my first choice), some olive oil and some balsamic vinegar (S&P too!). I tossed it all together and put it into a 375 degree oven for 30-35 minutes. Halfway through, I took it out for a little stir and put it right back in.


This is a nice light summer dish, and you could easily substitute zucchini and basil instead of the yellow squash with parsley!

Monday, January 22, 2007

Chipotle Tomatillo Salsa


We made a pilgrimage to Penzey's in Arlington, Mass on Saturday - to stock up on some spices and get a feel for what the whole store would be like beyond the catalog. We certainly had a good time smelling all the spices and mixes - they have glass jars with samples of each so you can experience the aroma (warning: avoid deeply inhaling the powdered jalapeno!), although we also had our nit-picks with the store and it's location, etc. Mr. Penzey, if you read this, call us up for some advice on how to improve your business here in Boston!

We stocked up on a few necessities: cumin, fennel, tarragon, sage, chili powder, and others. We also picked up a bag of chipotle peppers - totalling about 10 of the smoked, dried jalapenos. So we naturally decided to make chipotle salsa!

We decided to try for the "real" stuff - no chunky, everything-but-the-kitchen-sink salsa... we wanted authentic chipotle salsa. So we picked up some tomatillos to make our salsa with - like little tomatoes with a husk, you char the outside to get to their tart, lemony flavor. Along with some limes, garlic, and salt - we'll bolster the volume with just a few spoonfuls of canned/stewed tomatoes - and that's it.

So first we had to rehydrate the chipotles by boiling three of them in water for 20 minutes. By the end of that time, the dry, shriveled peppers had re-grown to full jalapeno size and shape. We let those dry and then sliced them open to remove all the seeds and any water left inside.

Next, we husked the tomatillos and then charred each of them over the stove burner using tongs until the outer skin is just barely starting to blacken. You can feel the water inside the tomatillos starting to boil as they heat up on the hot flame!


Peel a couple of garlic cloves and cut two limes in half and we're ready to go! Into our little food processor: the three split chipotles, the eight charred tomatillos, two cloves of garlic, the juice from one lime, and a healthy pinch of salt. Chop, chop, chop... Blend, blend, blend... it almost instantly became a watery consistancy. A little taste tells us that it is SPICY and smokey, and that we need more lime, more salt - and to fill it out with some of the stewed tomatoes.

So we added a few big spoonfuls of the tomatoes and more lime and salt and chopped it up some more. Then it was into a container and into the fridge for a good sit.

An hour later, we gathered some tortilla chips and we were finally ready to taste the result - so smokey and spicy and delicious! It tasted like the salsa from one of our favorite authentic Mexican restaurants - Salsa's in South Boston. Stacey believed it was a little TOO spicy for public consumption - but just right for us. This stuff was ADDICTIVE, we had to physically remove it from the table after a while because we couldn't stop eating it! A cold beer helped wash it down and quenched our burning lips. Awesome stuff!

Sunday, January 14, 2007

Eggs Benedict


We needed a hearty breakfast to get us going because today is a great day!! It is Sunday in January and that means we get to do one of our absolute favorite things - sit in the kitchen and watch football all day while cooking and drinking our way through the games! Not only that, but our beloved PATS are playing at the San Diego Chargers in the later game (4:30) - in the most anticipated matchup of the weekend... It is rainy and miserable out and we're still in our pajamas in the kitchen, and we'll be BLOGGING ALL DAY! A few cups of coffee and this Eggs Benedict has us ready for the full day ahead.


Let's get it started!

It's almost 1:00 and the first game is coming on - Seattle at Chicago - so we are ready to eat. We started toast in the toaster oven and added some breakfast ham slices to a hot pan. Then we started poaching our eggs in a big saucepan of simmering water with a few splashes of white vinegar added (to keep the egg white from spreading out). We crack each egg into a small glass bowl and add them to the water one-at-a-time as gently as possible.

Those eggs will be ready in 6 minutes so we crack two more eggs for the hollendaise - for the yolks alone. Break up those two yolks and squeeze in a half a lemon's juice. Add that to the double boiler and start wisking and adding 1/2 stick of butter, a little at a time and constantly whisking to melt the butter.

Additionally, we sliced a big, red tomato into pretty thick rounds and sprinkled on some kosher salt and a little squeeze of that lemon.

Ok! Toast out, ham slice on the toast and tomato slices on top of the ham, the egg (that has been sitting temporarily on a paper towel to get rid of all that water!) goes on top of the tomato and on top of ALL that is a ladle-full of your hollandaise. DELICIOUS - love the lemony-buttery sauce mixed with the soft-cooked yolk of the egg! We ate these hungrily with a glass of OJ and we are ready to go.

WE'LL BE POSTING ALL DAY AND WE HAVE LOTS PLANNED, SO COME BACK AND SEE WHAT ELSE WE'RE UP TO!

Monday, January 08, 2007

Chicken Chili


Last night we were reminiscing about winters past and how we'd be holed-up in our old apartment on freezing, snowy Sundays, watching football and venturing out to walk to the store for "supplies" and maybe to clear the car of snow. Both of us having been brought up in some very snowy regions of New England, we certainly love the snow - so we'd always enjoy getting bundled up to head out and otherwise being "snow-bound" on those December and January weekends. For example, here is a picture of our old street in the South End of Boston from the evening of December 6th, 2003:


This weekend, January 6th, 2007? We played tennis at the park and sat out on the back deck in the sun wearing shorts and t-shirts. It was nearly 70-degrees on Saturday! We've had a TOTAL of .5" of snow so far this winter, and - on the Boston Common - the trees are sprouting flowers and the tulips are starting to come up. WHERE ARE YOU WINTER? WHERE ARE YOU SNOW? COME BACK TO US!!! (why do I think I'm going to regret asking that...?)

Regardless, it's still technically winter and playoff Patriots football is on, so we decided to do what we've done for years and make Chili. Chicken Chili, to be exact, but something a little different than our old White Bean and Chicken Chili. This Chicken Chili was going to be meatier - with two different "types" of chicken, breast chunks and ground chicken - and more traditionally "chili"...

We started some water boiling and cut up 1.6lbs of boneless/skinless chicken breast into big chunks before dropping them into the boiling water for ~10 minutes - until they were simply poached and cooked through - then just take them out and let them rest. At the same time, we started our dutch oven on medium-ish heat and browned 1lb of ground chicken.

As that was finishing and after drained, we seasoned with our collection of chili spices that we'd use throughout this recipe: Ground Cumin, Mexican Oregano, Chili Powder, (a little bit of) Cayenne Pepper, Smoked Paprika, and salt and black pepper. The Cumin, Mexican Oregano, and Smoked Paprika were all from the recent Christmas Gift of Penzey's Spices that we received from Stacey's Parents - greatest gift ever!

The now-seasoned ground chicken comes out, we gave the dutch oven a wipe and started some fresh oil and in went a couple of medium onions chopped to 1/2" pieces - to sweat it out for almost 10 minutes on low-ish heat. Then a green pepper and a red pepper - all chopped to 1/2" pieces - joined the party for another 10 minutes. Finally, we added a couple cloves minced garlic and let this all come together for 5 more minutes. We then seasoned with the same combination of spices that went on the ground chicken... and turned up the heat.


When the veggies were cooked down and getting very tender, we added about a cup of chicken stock and used our wooden spoon to rub off all of the cooked bits in the bottom of the pan - getting all those spices and flavor into the new liquid. Then we immediately added 2 32-ounce cans of diced tomatoes and 2 small cans of tomato sauce and got all of that up to temperature.

As that was heating up, we shredded that poached chicken breast with our fingers and add it piece-by-piece into the chili. Finally, the cooked-and-seasoned shredded chicken gets added back in. We decided we needed some more liquid, so we had an extra cup of chicken stock on hand, of which we added another 3/4. An initial taste and addition of seasoning and then it was set phasers to simmer and see-how-long-we-can-wait time!


After about 20 minutes, we were ready to add the final ingredient - beans. We knew we had about 20 minutes left total cooking time, so in went a 32 oz can cannelini beans and a 16oz can pinto beans.

After that final 20 minutes, we were back in tasting and re-seasoning... just a little more of that wonderful oregano and a little salt and it was tasting spicy and delicious. Scoop out a nice, chunky spoonful into a bowl with a dollop of sour cream and we were ready to eat.

With great smoky flavor from the paprika and cumin, spice from the cayenne and chili powder, and lots of meat from all the chicken, this Chicken Chili came out wonderfully spicy and really hit the spot on a Warm Winter's Day. The flavor was almost "buttery" from all the spices and the liquid... The leftovers will certainly be even better and a big ziplock bag of this Chicken Chili will end up in our freezer for when the REAL cold weather comes!

Monday, July 31, 2006

Bluefish "Burgers", Grilled Corn on the Cob, and a Tomato Basil Salad

We've been eating alot of fish and shellfish lately - trout, steamers, haddock, and now bluefish! Inspired by our favorite food blog, Helen's Beyond Salmon, and her recipe for "the other burger", we decided to make our own bluefish burgers! Morse Fish Company had some very fresh bluefish for $6.99/lb so we picked up a pound and brought it home. Along with that, we got some fresh corn on the cob and a couple of big, red tomatoes.

Back at home, M pulled the bluefish off of its skin in little chunks until he had shredded the whole thing. Then we mixed in some mayo (maybe 1/4 cup), dijon mustard (couple dollops) and some onions we had previously sauteed and allowed to cool (a medium onion, diced tiny, cooked with a generous pinch of salt). We would have thrown in some cilantro, but alas, we had none...

This made for VERY loose consistancy - not like patties at all, it would go right through your fingers. Undaunted, we scooped up 1/2 the mixture and plopped it onto a sheet in a relatively patty-shaped fashion... then repeated with the other 1/2. This sheet went into the fridge for a couple of hours and it was during this time that it solidified enough to work with.

The corn on the grill we have down pat by now: Peel back - but don't remove - the outer husk and remove the silks. Then fold the husk back up over the corn and use kitchen string to secure. Submerge in a bowl of water for 30 minutes so the husks get wet and the corn plumps up a little and they are ready to go. Hot grill, but careful over direct heat (the husks will burn a little, no problem) for 25 minutes, turning frequently. A little butter and salt and you have perfect corn on the cob!

Back to the bluefish... The only disappointing thing about this recipe was that they were to be pan-fried and not grilled. But we wanted to cook outside! Not to worry, we simply took our little le creuset baking dish and placed it right on the grill - using it as a griddle!

We pulled out the now-somewhat-more-solidified bluefish patties and sprinkled the top side with breadcrumbs. Carefully flipping over, we finished lightly breading the other side and forming these into actual patties - they were perfect consitency by this point.. to our relief!

We put the baking dish-cum-griddle over a medium high heat, carefully added some olive oil, then dropped our bluefish in... cooking them for about 5 minutes per side.

We served them up on a bed of baby spinach with the grilled corn, and a tomato, EVOO and basil salad. Not really burgers - more like patties. They were ABSOLUTELY DELICIOUS!!! Wonderful flavor and texture - we'll definitely be refining this recipe a little and making these again! Thanks, Helen!


Sorry about the pictures, we are trying to use a new old camera and may just have to go digi camera shopping...

Tuesday, May 09, 2006

Pasta Puttanesca

Is our Pasta Puttanesca the real thing? Maybe not, based on some of the recipes we've found online... Truthfully, however, our version sounds better because we make it with chicken and fresh (not canned) tomatoes. Unlike a deep, long-simmered pasta sauce (which we love, but...), our puttanesca recipe is a quick and fresh-tasting version of this famous "whore's pasta". From Wikipedia:

The name originated in Naples after the local women of easy virtue. Puttana means "lady of the night" (i.e. a prostitute), but the reason why the dish gained such a name is debated. One possibility is that the name is a reference to the sauce's hot, spicy flavor and smell. Another is that the dish was offered to prospective customers at a low price to entice them into a house of ill repute. According to chef Jeff Smith of the Frugal Gourmet, its name came from the fact that it was a quick cheap meal that prostitutes could prepare between customers.

Fun! What's better than a dish with a spotty history?

Our version of puttanesca goes down very quickly - we don't start with the sauce until we drop the pasta (whole wheat penne) into the boiling water. The whole dish takes 12 minutes from the time the pasta goes in, so quick is an apt description. Because it all happens so fast, we like to sous everything up before hand:

  • Chicken breasts cut into big-bite-size-ish pieces
  • Flour seasoned with black pepper, kosher salt, and a little onion/garlic powder
  • Five big plum tomatoes seeded and chopped into nice-sized chunks
  • A bunch of Spanish/pimento-stuffed olives (a few handfulls, maybe a little less than a cup) roughly chopped
  • A few tablespoons of drained capers
  • Anchovy paste - in a tube
  • Two lemons cut in half - for juice
  • Parmesan cheese - in the green can or fresh grated, if you're cool like that

Water boiling, penne goes in and the timer is set for seven minutes. Chicken chunks get dredged in the seasoned flour - just a very light coating - and then added to a hot pan with olive oil in it. Brown the pieces on the first side (3-4 minutes), then turn over. Squeeze one of those lemon half's worth of juice on there and continue to cook a few minutes. Then add the chopped olives and capers and a couple squirts of anchovy paste - whatever your tastes are - and a couple more squeezes of lemon juice and mix that together. After another minute, add the tomatoes, salt and pepper, and any more lemon juice to taste - and stir to combine.

At this point, the pasta should be done and drained. After two minutes, we're ready to add the pasta and a generous amount of parmesan cheese. Fold all of this together and serve hot!


We LOVE the very briney anchovy-and-olive-and-caper flavor of this dish... some people don't, however, and you can easily modify this recipe to your taste. Instead of the capers and anchovy paste, add fresh basil (at the end, with the tomotoes) and mushrooms. Or spinach. Regardless, you'll have a fresh-tasting chicken pasta dish that produces, yup... GREAT LEFTOVERS!

Grazie,

Il Chef De Boston

Wednesday, May 03, 2006

Ratatouille with Grilled Chicken

Annnnnd... WE'RE BACK!

Today, yesterday, and the day before that, it has been raining in Boston. The baseball game was rained out, the grass and trees and flowers are getting much-needed (but still very gloomy) water. Should be looking up for the weekend, which is what counts. And this past weekend, it was warm and dry enough to once again fire up the ghetto-grill (our camping grill, being used until we buy a real one) and make some grilled chicken pieces.

Let's go to Boston Chef #2 for the chicken, before heading to BC#1 for the Ratatouille...

We had a sampler pack of three thighs, three drums, and three wings that I brined for a couple hours before taking out, rinsing, and putting back in the fridge for another 1/2 hour for it to rest and relax (tough life, chicken pieces)... A gentle salt, pepper, paprika seasoning to the outside and they went onto a high grill for about 4 minutes/side before turning the heat to low and covering for another 15 minutes or so. Lots of flare-ups from the fat, but leaving the cover on pretty much contained them, cut down cooking time, AND gave the chicken great flavor.

Now over to Boston Chef #1 with the Ratatouille...

By complete chance, we had all the ingredients for a veggie dish that I’ve been wanting to try out for quite some time – Ratatouille. Since the other Boston Chef was in heaven because he finally had a chance to grill up some chicken outside, it was on me to prepare the accompanying dish inside. The stars were aligned that day, my friends, for I found an eggplant in the back of the refrigerator. I bought it on a whim a few days earlier with nothing in mind and I had forgotten about it until now. Low and behold I also had zucchini on hand... looks like ratatouille tonight!


All veggies are cut up into 1 inch chunks: medium eggplant, 2 small zucchinis, 1 large onion, 5 plum tomatoes. (I would have thrown in a green or red pepper if I’d had one.) Toss the veggies with some olive oil, 2 tbs tomato sauce, fresh thyme from the back porch, garlic powder, salt & pepper. We cooked this French Provencal casserole in enameled cast iron dish at 400-425F for about 45 minutes, stirring every 15 minutes. Sprinkled with a little parmesan cheese before serving. It was better than I expected and definitely will cook this up when entertaining!

Before cooking:


And after, with the chicken... LETS EAT!

Monday, February 13, 2006

Eggplant Parmesan

As you can tell from previous posts, we watch what we eat in an avoid-processed-sugar-or-flour fashion... so we only eat whole wheat pasta. Obviously, this fact makes it tough to make lasagna with big, broad sheets of pasta - but we still love the steamy goodness of a big plate of sauce and cheese and filling pulled straight out of the oven and the wonderfully delicious leftovers that come as a reward for all the work. So what can we do for filling that is not pasta? Why, eggplant, of course!

To drain the bitterness out of the eggplant, we slice 2 big eggplants up (the round way, not lengthwise) and layer them in a colander with generous amounts of salt on each layer. We put that colander in a big glass bowl and cover the layers of eggplant with a sheet of plastic and another bowl that is heavily weighed down. Leave that in the fridge for a few hours and you'll see the liquid draining to the bottom, taking some of that bitterness with it.

Next step is to fry those eggplant slices up. We do an easy assembly line of rinse eggplant slice, pat dry, BARELY dust with wheat flour, egg wash, breadcrumbs, into a big pan with about 1/2" of canola oil.

Fry those bad boys up for about 3 min/side and set on a paper towel-lined plate.


At the same time, we made our sauce. See Our Meat Sauce entry - we make it basically the same as this for our "eggie parm."

Sauce:


Other ingredients - fresh basil and fresh and shredded mozzarella.

CONSTRUCTION TIME! 1/2 layer of sauce, spread about in a "pam" sprayed glass baking dish just to coat the bottom and prevent burning; layer fried eggplant; layer sauce; layer mozzarella and basil; layer fried eggplant; layer sauce; layer mozzarella and basil; layer fried eggplant; layer sauce; layer mozzarella and basil plus some shredded mozz and some grated parmesan on the top to round out the cheese. Sweet...


BAKE! We went 350 for about 40 minutes.. worked for us!


Score: Eggplant Parm.. 10! The big one-oh! 1000000!!! No bitterness, so tender, the eggplant. Fresh basil and mozz give a wonderful FRESH flavor... sausage in the sauce makes everything perfect.

Leftovers: 0! The disaster we alluded to from our last post - we left that whole big platter of de-bittered, fried eggplant, sauce, and baked goodness out OVERNIGHT... no leftovers for us, the remainder after dinner when in the garbage the next day. So, we shed a tear and move on...

What was, and could have been again:

Thursday, February 02, 2006

Cold Appetizers - Walnut and Blue Cheese Grapes and Cherry Tomatoes stuffed with Olive Tapenade

Let’s try our hand at appetizers! We’ve been invited to a neighborhood post-holiday party and since our last name is in the beginning of the alphabet, we were assigned an appetizer. Boston Chef #2 and I found a couple of grand sounding recipes on foodtv.com – walnut and blue cheese grapes and tapenade stuffed cherry tomatoes. Unfortunately Boston Chef #1 (that’s me) was running late that day and didn’t make it to the grocery store until 2 hours before go time. So the scores we give these dishes are lower than what we would’ve given them had they more time to chill out in the fridge. (We had some leftover which indeed tasted better the next day).

Walnut and Blue Cheese Grapes
Chop up about 2/3 cup walnuts pretty finely and then toast those at 325F for 8-10 minutes.

Using a hand mixer (which Boston Chef#1 is scared of due to an incident involving a 40 year old mixer that liked to stealthily start by itself especially when my fingers were nearby) or a food processor, mix 6oz Gorgonzola with 4 oz lite cream cheese until smooth.

Now here comes the EXTREMELY messy part. Pull up yer sleeves!! Make sure your red or black seedless grapes are washed and dried. Put ~1tbs cheese mixture in your hand and glop around the grape. Don’t worry about the prettiness factor at this point, trust me! Put grapes on sheet pan and refrigerate for 30 minutes or longer. Then roll those suckers in the nuts and put them in the fridge again for at least 15 minutes.

Remove and slice in half and you get little apps that strangely resemble eyeballs. Maybe a good app for a spooky Halloween party?!?

Score: 5.5 out of 10 the night of, but after an overnight chill, score goes up to a 6.5. Definitely chop walnuts finer than you think.


Tapenade stuffed cherry tomatoes

Cut a little sliver off the bottoms of about 30 tomatoes so they’ll stand up, and then cut of the top about ¼ way down and hollow them out.

This is actually supposed to be a Spanish tapenade using Spanish Brandy, but heck, I’m just buying a nip and I doubt they had froufrou Spanish brandy in the nip/tuck size.

Mini-chop to the rescue…fill er up with ½ cup Spanish olives with the pimentos, 1.5tsp capers, 1 tsp cheap-o brandy, ¼ tsp lemon zest, 2 tbs olive oil, black pepper and some lemon juice.

Spoon into the tomatoes, garnish with fresh chopped parsley and refrigerate!

Score: Nite of 6/10, next day 7.5/10


A bit too salty, but that mellowed the next day. Definitely throw in a garlic clove (maybe 2 depending on the size of them, and maybe fewer capers.

Thursday, January 26, 2006

Our Meat Sauce

There is really no other name for it - tomato-based (pasta) sauce with sausage, bacon, onions, garlic, squash, mushrooms, and fennel and other spices... Ragu, Red Sauce, Meat Sauce, whatever! You get it together and you cook it a while and you take it and pour it over the object of your desire - making pasta, bread, even lawn clippings taste fantastic! (Don't eat grass.) Let's do this - photoblog style!

Meat:
* Hot Italian Sausage (we got Perri) stripped of it's casing
* Bacon cut into one-inch pieces, we had some extra lying around that woulda gone bad before the weekend. Let's use it for the fat (and smokey flavor) in this sauce

Veggies:
onion in little 3/4 inch pieces, diced garlic, yellow summer squash in 1/4 round cubes, sliced mushrooms

Tomatoes:
two cans diced tomoatoes, two small cans tomato sauce

Spices:
freshly ground fennel, salt, pepper, oregano, basil

Pasta:
whole wheat Penne and Rigatoni to fill out the amount we need.

Liquid:

Red wine (cabernet sauvignon) to deglaze (about 1/3 cup)

LET'S GO!

Bacon goes in first to start rendering the fat, while this is going on take the sausage out of it's casing - just make a long, shallow slice lengthwise and turn that sucker out.


Also, get that water going for your pasta!

Add the sausage to the bacon/bacon fat and brown. As it cooks be sure to break it up along the way. As you can see here, we use a splatter screen to - what else? - try and minimize splatter all over the cooktop.


Browned and removed, drain most of the fat, leaving the burny bits from the sausage and bacon at the bottom. Refresh with a little olive oil if you wish and get the onions going. After a minute or so, add the garlic. After a few more minutes the yellow squash is ready to go in. Not long after that, the sliced mushrooms go in.


This is a good time to deglaze, although we could have (should have?) done it sooner, too. Add red wine and scrape the pan with a wooden spoon to incorporate the burny stuff at the bottom.

Allow the red wine to get nice and bubblin' to burn off the alcohol and really pull the flavors out of the Cabernet (use whatever you like!)

Cook and gently stir all this for maybe 4 or 5 minutes. With that veggie mixture in place, let's season:

We like adding freshly ground fennel seeds that go great with the sausage. We got this great grinder for our wedding from our friends Trish and Brooks - just throw the seeds in and twist. Voila! Ground fennel. We added fresh ground black pepper, coarse sea salt, and dried oregano and basil. (The tomoatoes we're about to add aren't seasoned at all.)

Spice Grinder w/Fennel:


Mix that together and we're ready to...

Add the tomatoes - throw them all in. Because we're not adding alot of liquid, the sauce will provide that liquidy texture and allow some time to cook all the flavors together. Once the tomatoes are up to temperature, go ahead and add the meat back in and combine. Set to low, cover with splatter screen, take a deep breath, and simmer.

At this point, a glass of that same cabernet is in order. After as long as you can take - 10-20 minutes, you're ready to go.


Drop your pasta in when you are about 10 minutes away from being ready. We use whole wheat penne and rigatoni tonight, as we had the ends of those two boxes. Boiling, salted water - 10 minutes til al dente!

The final product after some grated parmesan. That is a BIG plate... plenty of leftovers from this dish. We only boil enough pasta for one night, for leftovers we'll boil new pasta and reheat this sauce in the microwave and combine.


SCORE:
* Pasta Sauce Dinner - 9 out of 10. - Gold star - Super Duper - Grade A - Splendid!
The smokey flavor from the bacon and the fennel-y sausage and deglazed veggies are fantastic. We forgot the green pepper - maybe that woulda gave it that last point!

DELICIOUS! See you next time!

The Boston Chef