Sunday, April 27, 2008

Pickles x 2

This post is a 2-fer - I was saving up the first recipe until I tried another bright idea. Last year I made pickled pink beets & eggs and not only were they pretty, but also extremely delicious. Again this year for Easter I whipped up a batch of these beauties and they did not disappoint!

To revisit... fill your pot with half water, half cider vinegar and bring to a simmer with 1 can whole beets and their juices, 1/2 to 1 cup brown sugar (taste it and add to your liking!), and a dash of cinnamon. After simmering for ~10 minutes, turn off the heat and add your already peeled and hard cooked eggs. Let that sit out at room temp until cool. Transfer to your fridge liquid and all where they will keep for at least a week.


Bright idea #2 came to me the day I made the picked eggs, but it took about a month to implement. We love giardinera in our house... if you are unfamiliar with this super yummy jar of goodness, it is a mix of spicy and pickled veggies like carrots, peppers and cauliflower. So I thought, what if I culd recreate this at home and add EGGS? Genius? Probably not, but I felt like one at that moment! I kind of came up with this on the fly, so bear with me.

Same as above - pot with half water, but this time I used half white vinegar instead of the cider vinegar. I used white sugar instead of brown and added some Kosher salt as well. At this point, I tasted as it's important to have the sour salty and sweet nicely balanced. I'd say about 1/2 cup white sugar and 2 tsps of salt, but it depends of how big a a pot you use (mine holds 8 cups).

Then I added at least 1 tbsp of crushed red pepper flakes, about 15 whole black peppercorns, 1 tsp mustard seed, and a couple of jalapeno rings for garnish. Most of the spicy flavor will come from the flakes. Follow the recipe from above, simmer 10 minutes, turn off heat then add your eggs and veggies. For veggies, I used frozen crinkle cut carrots and cauliflower. If you want to use fresh veggies, steam or parboil them first.

These were superbly tangy with a kick of hot in the aftertaste...perfect little pickles for your next soon-to-be-summer BBQ!

Tuesday, April 22, 2008

Apple Cornbread Stuffed-and-Grilled Pork Chops

This one is a keeper... the crumbled cornbread is mixed with diced apple sautéed in butter and - while the pork chops are grilling - the juices combine with the cornbread stuffing and make such a great sweet, grilled flavor. Yum - we'd like to serve this for guests sometime soon... anyone free this weekend???

We start off by making our Cast Iron Skillet Corn Bread. Although we had to use lowfat milk instead of buttermilk and didn't go with the bacon this time, still came out sweet and corny (ha). The great thing about this recipe is that we'll only use maybe 1/4 of that skillet of cornbread - the rest is for us to enjoy!


This recipe was cribbed from notes of an Alton Brown preparation of some Stuffed, Grilled Pork Chops, and you'd never believe it - but he brined them first! (He brines everything.) So, so did we - in cold water, kosher salt, about a cup of cider vinegar, maybe a 1/4-cup of brown sugar, and some Tellicherry peppercorns. Combined well, we added our bone-in pork chops - about 1" thick - and they took a swim for a couple of hours.

After the brine the pork chops will have taken on a little gray color on the very outside, just as you would see on a brisket or other cut of meat that you are brining with vinegar (unless you add nitrates to keep it pink). Don't even worry about that gray color - that just means you did it right.

So, 1" bone-in pork chops brined and cornbread cooling... the final piece of this puzzle is one diced Braeburn apple, sautéed in about a 1/3 stick of butter along with a little sprinkle of brown sugar and a pinch of salt. When cooked soft, add that apple-butter mixture to 1/4 of your cornbread that has been crumbled into a bowl - and mix together to make your stuffing.

Assembly: cut an incision into the "top" meaty part of your pork chops with a sharp-tipped knife and cut through the middle of that meat to make a pocket for your stuffing. Then, stuff. As much apple cornbread mixture you can fit, and flatten it down in the chop to distribute evenly. Repeat.

A simple salt and pepper and sweet paprika sprinkle on the outside of your pork chops and onto a hot medium-high grill for 3 minutes, then "twist" (or rotate) 90-degrees to create the grill cross marks (thanks, Alton) and go 2 more minutes. Then flip, 3 minutes, rotate 90-degrees, 2 minutes, done. After a few minutes cooling time, you're ready to eat.


We had ours with some sautéed swiss chard with raisins. Remove the red ribs from the chard, dice them up and add to a large pan that already is warmed with some olive oil. Sautée for just a couple of minutes and then add a handful of raisins and 1 cup of chicken stock. Cover and simmer for 15 minutes. Remove the cover and add the greens which you have roughly chopped. Let those wilt for about 5 minutes, and some salt and pepper to taste and you have a great healthy sidedish. The sweetness of the raisins balances out the slight bitterness of the chard.


The pork chops with their cornbread and apples and paprika crust came out so wonderfully charred and sweet, so moist, and so flavorful... we were in love. Along with the swiss chard with it's sweet, plumped raisins and a little slice of cornbread, this meal is definitely a keeper. Come on over!

Tuesday, April 15, 2008

Pig Trotters


As we've learned from some of our favorite Food television personalities - Anthony Bourdain, Mario Batali, Andrew Zimmern - and the worldwide Michelin Star chefs that they visit with on their shows, some of the best and most-flavorful cuts of meat are often the ones generally left unused. The offal, the cheeks, the tails, the gizzards, the marrow, the entrails, the feet - these life-long, 80-hour-a-week chefs swear by them and seek them out. Despite the "Boston Chef" name, we are not chefs. But we do like to learn from chefs and experiment with that knowledge.

So, pigs feet. $.99/lb at the grocery store, split in half and pointing at us - beckoning us to give them a shot.


This occasion is one of many in which we buy something at the store with no idea of how to cook it, then we furiously scan the internet for ideas and recipes when we get home. We decided we'd do an amalgamation of a few recipes we ended up finding, chiefly from these wonderful new blogs we've discovered: Slurp & Burp and In Praise of Sardines.

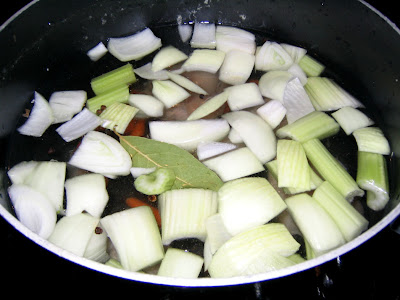
So we first blanched our trotters for 5 minutes in boiling water as a preliminary cleaning, then added them back to the rinsed pot along with an onion and a few stalks of celery cut into 1" chunks, a few peeled cloves of garlic, a big bay leaf, a handful of peppercorns and a few whole dried cloves - and covered all of that with cold water.


We brought that back to a boil, covered tightly, and let them go for 3.5 hours. Although the recipes we referenced noted we'd have to skim the fat during that simmer time, we never had much fat boil up to the top - so we just let those trotters go! After that time, we removed the now falling-apart pig's feet and let them cool until they could be handled.


Then we picked them apart. The skin was peeled off and set aside, and everything else - the meat, the tendons, the cartilage, the gelatine - was removed from the bones and placed in a bowl. Everything that wasn't bone was going back in to be eaten.

After the bones had been cleaned of meat, we cut up part of the skin and added that back to the meat mixture - maybe 1/8 of the final product consisted of the skin. Then we chopped all of that mixture together into a sort of ground meat consistency and put it in a bowl. To that, we added the chopped green ends of a baby vidalia onion (the "onion" part of which was being used elsewhere), kosher salt and ground black pepper, and about a tablespoon of dijon mustard.


After mixed together, we packed our concoction into two oven-safe ramekins...


...topped them with a thin layer of breadcrumbs, and placed the ramekins in a larger pan for handling's sake.


And we put them into a 450-degree oven. After about 10 minutes, the pork mixture was bubbling up and the bread crumbs were beginning to cook. We wanted that topping toasted and crunchy, so we fired up the broiler and moved the ramekins right up under the blue-hot flame and watched closely. Another couple of minutes and they were done.


To counteract the meaty dish, we prepared a briny "salsa" of capers, a diced pickle (it's LIKE a cornichon!), some leftover onion greens, a dab of anchovy paste and a dab of dijon, some olive oil and some red wine vinegar. Then, we topped a bed of baby arugula with the salsa and - after the trotter dish had cooled just a little - ate it.

The pigs feet were very good - much as noted over at In Praise of Sardines, the resulting meat is unctuous. It has a gelatine consistency that alone would not stand up but - when combined with a little crunchy breadcrumb crust, a crisp arugula leaf and the briny salsa - has a deep mellow pork flavor that was wonderful. Getting that balanced fork-full of pork, crust, arugula, and salsa resulted in a perfect bite - and there were those few bits of very dark meat/marrow that were the real prizes in the hot little ramekins.

Would we do it again? Maybe, maybe not - it was alot of work. But what we WILL do is look for Pig's Trotters - and cheeks, and offal, and marrow, and tails - when we're out at our favorite restaurants!

Friday, April 11, 2008

Sausage Stuffed Chicken with Braised Endive

We were watching Food Trip with Todd English on WGBH here in Boston - which is now in HD! - one lazy Saturday morning. This morning was the first time we'd seen this show, Todd English goes on road trips around the U.S. checking out local cuisine with chefs in different areas of the country. On this episode he was in the Southwest learning about eating cactus and which greens grow in the desert - plus, he visited a local chef who made sausage-stuffed quail. We though that was a great idea, we've always stuffed chicken "roll-ups" with ham and other items - but never sausage.

So we gave it a shot - we butterflied and pounded flat some 1/2 chicken breasts and seasoned inside and out with salt, pepper, and an Italian seasoning mix (basil, oregano, fennel). Then, we simply added a couple of tablespoons of sweet Italian sausage (rolled sort of lengthwise) and a sage leaf to the middle of the flattened chicken. No need for toothpicks, you can just fold the chicken over the sausage and form it back into a half breast.

To cook - our new favorite method of pan sauteeing to brown over pretty high heat, then into a 350-degree oven for 15 minutes. These came out pretty good, the less sausage the better - so it can keep up with the cooking time of the chicken. We'll certainly be trying this one again. With this we had braised Belgian endive...

Belgian endive reminds me of my time living in France when I was a young college girl. My French mother introduced me to a plethora of new foods and new ways to eat foods that I already loved. Madame Chesneau was my Julia Child -- she gave me the ideas and tools that will forever be a part of my kitchen experience. For the endive, she would serve a raw leaf with cheese and dried fruits. Or perhaps it would be sliced in a salad or braised. When braised, it is an interesting light veggie that is slight sweet and bitter.

At the store pick endives that have their leaves intact, not bruised and that are creamy white with yellowish-green tips. Slice it lengthwise without removing the root end. In a heavy bottom pan, melt 1-2 tbsp of unsalted butter and when bubbly, add the endives cut side down. Let that sautee/carmelize for about 5 minutes on that side, and then turn for a few minutes more. Return the endive to the first position and add some chicken stock (want the liquid to be at least 1/2 inch deep) salt and pepper, some lemon juice and a little bit of sugar. Cover, turn to medium low and let braise for 20 minutes. The liquid will actually turn a bit milky in its appearance, and that's ok.

The endive came out tangy and sweet and really tasty! Still a little firm at the "ends", was a great side with rice and the chicken...